Making nice web pages is fastest with templates. Flask web development framework uses Jinja2 templates, my favorite template engine.
Base template contains the common parts: HTML boilerplate, navigation, headers and footers. The actual pages extend the base template. This way, the actual pages can be very short, and only contain the parts unique to that page, such as article text or a web form.
Following this article requires fluency with Linux command line interface, Python and HTML. You also need to have Flask installed as described in “Deploy Flask & Python3 on Apache2 & Ubuntu“.
Base Template
As you have installed Flask according to the tutorial, your ~/flask/ directory contains just “moi.wsgi”, “moi.py” and “__pycache/__”.
Your templates in templates/ folder. Flask has built-in support for templates, and it will automatically look for this directory.
$ mkdir templates
$ nano templates/base.html
Templates are normally HTML. For testing purposes, you should write some plain text to rule out typing mistakes in HTML tags. Contents of base.html:
This template says just TeroKarvinen.com.
Just having a template can’t be tested yet: you must use your template in your Python code to see it in action.
Use Template in Code
You can render a template with ‘flask.render_template(“base.html”)’.
Modify your moi.py.
$ nano moi.py
You must import render_template() function, and use that function to render your template instead of hard coded text.
## moi.py
from flask import Flask, render_template  ## modified
app = Flask(__name__)
@app.route('/')
def hello_world():
 return render_template("base.html")  ## modified
if __name__ == '__main__':
 app.run(host='0.0.0.0', port=5000)
Reload your site, otherwise it keeps running the previous code. As the Apache VirtualHost setup for your Flask site contains “WSGIScriptReloading”, you can reload your code without sudo. This is the default if you followed my Flask tutorial.
$ touch moi.wsgi
Now you can see your new template in action
$ curl localhost
This template says just TeroKarvinen.com.
If you see the text for your template, you have successfully set up templates for Flask. Well done!
You can now start learning the full power of Jinja 2 templates. Let’s write some HTML!
Valid HTML5
You should write your templates in valid HTML5. Luckily, this is the newest and the easiest dialect of HTML.
$ nano templates/base.html
Write your page
<!doctype html>
<html>
 <head>
 <title>Tero's Jinja Page</title>
 <meta charset="utf-8" />
 </head>
 <body>
 <h1>Tero's Jinja Page</h1>
 <p>
 See you at
 <a href="http://TeroKarvinen.com">TeroKarvinen.com</a>
 </p>
 </body>
</html>
Once you have written your HTML, check it with validator.w3.org Direct input. You should get a green bar “The document validates according to the specified schema(s).” That means that your page is valid. Writing valid HTML saves a lot of time in many phases of web projects, such as CSS writing, cross browser testing and testing mobile support.
You can quickly test your web page with ‘curl localhost’ or a text mode browser ‘lynx -dump localhost’. But you probably want to see it in a real browser.
If this running on a real computer (live USB or installed), simply open http://localhost with any web browser, such as Firefox. If you are running inside a vagrant virtual machine, you can set up port forwarding.
Vagrant Port Forwarding for Testing (Optional)
Vagrant port forwarding shows a port on your guest machine on the host machine. In this case, we can show the guest Apache port (http, 80/tcp) on the host machine (http-alternate, 8080/tcp). This way, you can browse your vagrant virtual machine with regular Firefox.
This setting is just for testing on Vagrant. It’s not used in production machines, as they are not running vagrant.
Disconnect from ‘vagrant ssh’ session
$ exit
On your host machine (the real computer), have a look at your Vagrant settings. Notice that the auto generated Vagrant file is just three lines. The rest is comments ‘#’ and empty lines.
$ nano Vagrantfile
Find the port forwarding line using CTRL-W. Uncomment it by removing the hash ‘#’.
config.vm.network "forwarded_port", guest: 80, host: 8080
Your Vagrantfile now has four non-comment lines, as you can see with ‘grep -vP ‘^\s*#|^$’ Vagrantfile’.
Vagrant.configure(2) do |config|
 config.vm.box = "ubuntu/trusty32"
 config.vm.network "forwarded_port", guest: 80, host: 8080
end
Load the new Vagrant settings by rebooting the virtual guest machine
$ vagrant reload
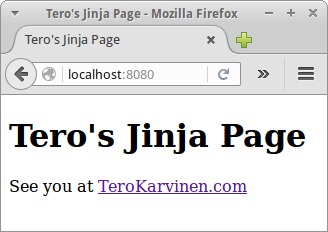
 Now you can see your pages on the host machine, your real computer. Open http://localhost:8080 with your regular, graphical web browser, such as Firefox. You must type the URL to your address bar, as modern browsers don’t allow websites to link to localhost.
Can you see the new, rendered web page: “Tero’s Jinja Page”? Well done, your port forwarding is working.
Use Template Inheritance
Put common stuff in the base tempalte base.html. Put only unique things in each page, such as the text of the page or a form. Normal pages inherit the base template.
$ nano templates/base.html
You can mark a block of the base template, so that other pages can replace it when they inherit base.html. You can choose the name of the block yourself. This is the new base.html
<!doctype html>
<html>
 <head>
 <title>Tero's Jinja Page</title>
 <meta charset="utf-8" />
 </head>
 <body>
 <p><em>Header, common for all pages</em></p>
 {% block contents %}
 <h1>Tero's Jinja Page</h1>
 <p>See you at <a href="http://TeroKarvinen.com">TeroKarvinen.com</a></p>
 {% endblock contents %}
 </body>
</html>
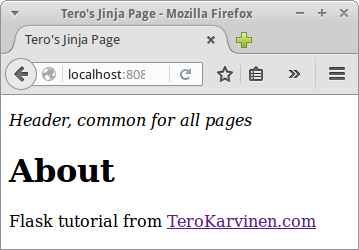
Open your page in Firefox, http://localhost:8080. It looks quite the same as before, except for the paragraph “Header, common for all pages” in italics.
If you want to validate the HTML, you must validate the rendered page. In Firefox, view source, then copy paste the source to validator.w3.org “Direct input”.
But why does the source look so long? Why does HTML have to be so verbose? Do I really have to keep repeating all my navigation in each page? No. Conveniently, you can just inherit the base template.
Create a New Page, Inherit the Base Template
Let’s create a new page. This includes writing the page HTML and adding a new page to Python source code.
$ nano templates/about.html
No boilerplate needed:
{% extends "base.html" %}
{% block body %}
<h1>About</h1>
<p>Flask tutorial from <a href="http://TeroKarvinen.com">TeroKarvinen.com</a></p>
{% endblock body %}
Yes, the actual pages are really short and clean.
Let’s use our new page in Python code
$ nano moi.py
We’ll just add a new function about(). Using the @route() decorator, we tell the URL where we want to see the page. And we use our new template with render_template(). For your convenience, this is the whole moi.py program. However, only three lines (marked with “# new”) have been changed.
from flask import Flask, render_template
app = Flask(__name__)
@app.route('/')
def hello_world():
 return render_template("base.html")
@app.route('/about')   # new
def about():   # new
 return render_template("about.html")   # new
if __name__ == '__main__':
 app.run(host='0.0.0.0', port=5000)
 Open http://localhost:8080/about and see template inheritance in action. You can see the text “Header, common for all pages” coming from your template. But the contents that are unique to about page (“About”, “Flask tutorial…”) come from about.html.
Templates allow your real pages to be really short. There is no need to repeat HTML boilerplate.
You have now set up Jinja 2 templates. Well done.
See also:
Flask 0.10 User Guide: Step 6: The Templates
Jinja2 Documentation