Puppet can control Windows 10 slaves, making it much easier to administer Windows boxes.
This article shows how to configure Windows 10 as a Puppet slave for an Ubuntu 16.04 LTS xenial master.
Of course you should consider Linux to make your life easier. You can download a free copy on Xubuntu.org. But many networks are heterogenous, having both Linux and Windows computers.
Prequisites: master-slave puppet on Linux
This article is written from memory. This article has many screenshots, because you need them in a life without Bash.
Set up Puppetmaster
Set up a puppetmaster, configure it to work with at least one Linux slave. If you are running short of computers, you can make it a slave to itself.
This step shows you that you can successfully configure the master, and any problems that follow are Windows peculiarities.
Download and Install Windows 10
Perform downloading and creating the boot USB stick from Linux.
You probably need a pile of licenses to run Windows 10. You know, the closed source, take your rights away and put business risks in their place kind of licenses. To save some money, see if some came bundled with your computers or if your employer has already bought a bunch of them.
Google for “download windows 10 iso” to find the official download page on Microsoft.com. Select plain “Windows 10” from the dropdown menu. N means no media player, single language might give you headaches when you later build your scripted installs. Select product language, I selected “English International”. Then you can either download your ISO image of about 5 GB, or see one of the many error messages the page gives randomly. If you get an error message, wait for a while or try from a different network.
The ISO image is in some weird format that’s not actually bootable. You must mount the image and copy the files on a FAT partition to create a bootable stick.
Take a USB3 stick and format it. Both MBR and GPT formating seem to work. Create a single FAT partition. I used gnome-disk-utility aka “Disks” for this.
Right click Windows 10 image, “Open with”, “Disk image mounter”. The image is mounted. Close all Thunar (file manager) windows, then open it again. Select all files in the mounted disk, right click, copy. Go to your empty FAT-partition on your USB stick. Right click, paste. (Or just use ‘cp -rnv’ or ‘rsync -vazh –progress’.
Boot Computer from USB and Install Windows
 Make full backup of target computer before installing.
Boot a computer to Windows. Connect USB stick, power on, press some button (e.g. F9). Select your USB device from the menu. Windows logo is shown.
In the installer, delete all existing partitions. Then create new. Windows is sometimes confused by hard drive contents; if this happens, boot Linux live USB and reformat the disk.
Use Custom install and say no when Microsoft wants permission to record your home or workplace, run a keylogger etc.
If you don’t have serial number / license key yet, you can click a link to say “I don’t have a license key”.
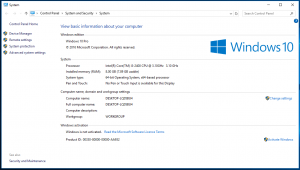 Once you’re on the Windows desktop, you’re done.
Disable UAC and Reboot
Yes, disable. No, it doesn’t help if you say “yes, go ahead” to every UAC dialog. You must disable UAC.
Yes, you must reboot. Doesn’t work without reboot.
Install Puppet as Administrator
Use the same version of slave/agent as your Puppetmaster. On Linux Puppetmaster, check the version with ‘puppet –version’. On the time of writing, Xubuntu 16.04 had Puppet version 3.8.5. Most computers are based on amd64 architecture, so choose a package that says “64”.
Google “windows 10 puppet download msi” to find official Puppet agent installation instructions for Windows and the actual Puppet MSI packages. I used puppet-3.8.5-x64.msi.
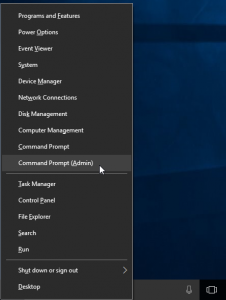 Ugly-X gives a practical menu of administrative tools. Ugly key on the keyboard is the one with the Windows logo. Choose command prompt as an administrator. Go to you download directory and execute puppet installer.
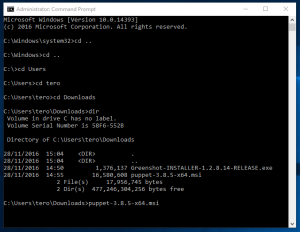 ‘
‘
Puppet is mostly Free software.
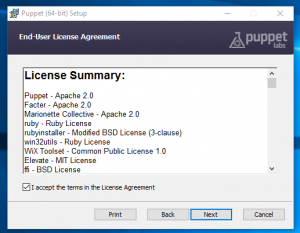
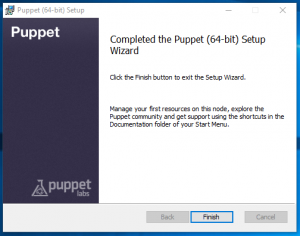
If you had any trouble installing Puppet: did you reboot after disabling UAC? Did you run the command prompt as administrator?
Tell Slave Who the Master Is
On File Explorer, show hidden files. You should also always show file suffixes.
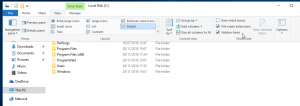
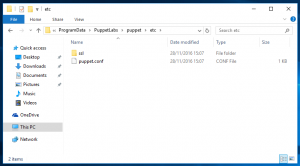
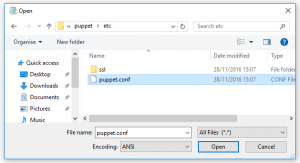
Notice the location of puppet.conf. It is in hidden directory C:/ProgramData/PuppetLabs/Puppet/etc/puppet.conf. (It’s not under Program Files).
Open notepad as administrator: search for it in start menu, then right click.
Locate puppet.conf and edit it.
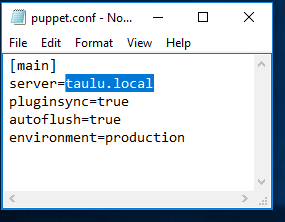
Set server to your master. In this case, my master is taulu.local. There are initial reports that you could also use master IP address with Windows agents.
In production networks, you should configure a real DNS name to your master.
Install Bonjour – Only If You Use .local Adresses
 Despite the name, we use Bonjour print services to make .local names work. They work automatically on Linux, and probably on Mac too.
Google “download windows bonjour print services” to find the official Apple download page for Bonjour print services. Run BonjourPSSetup.exe as Adminstrator to install it.
Open command prompt and verify that you can ping your master. ‘ping taulu.local’.
The .local name must work with ping before it makes any sense to try it with Puppet.
Run Puppet Agent
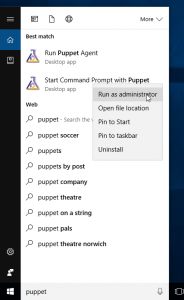 Puppet agent must be run as administrator. If run as non-admin, it will use a different environment. For example, the puppet.conf file with your master address would not be read as a normal user.
Search start menu for puppet, the right click “Start Command Prompt with Puppet” to “Run as administrator”.
Run
puppet agent -tdv
Accept Slave Key on PuppetMaster
On your Linux puppetmaster, see the keys
$ sudo puppet cert list
And sign the key. Use your own slaves name instead of yourslave.example.com.
$ sudo puppet cert sign yourslave.example.com
Run Puppet Agent Again
On your Windows slave
puppet agent -tdv
It should now fetch whatever modules you have configured on your master. Pay attention to error / success messages.
Create Hello Windows Slave Module
On Linux Puppetmaster, create a Hello Windows World module and mention it in site manifest. This is to show you the structure:
$ cat /etc/puppet/manifests/site.pp
class {hellowindows:}
$ cd /etc/puppet/modules/
$ cat hellowindows/manifests/init.pp
class hellowindows {
 file {"C:/hellotero":
   content => "moi\n",
 }
}
Run Puppet Agent on Slave
On your Windows slave “Start Command Prompt with Puppet” with “Run as administrator”:
puppet agent -tdv
Use file manager (ugly-E) to verify that your file is there.
Do you have “C:/hellotero”?
Well done, you have now made Windows 10 a Puppet slave.
As an exercise, you can create and publish a script to install Puppet on Windows. You could also install it with scripted install of the OS, or include it into your Ghost/CloneZilla image. When you are done testing, you can let Puppet agent service keep the slaves updated and stop running ‘agent -tdv’ manually.
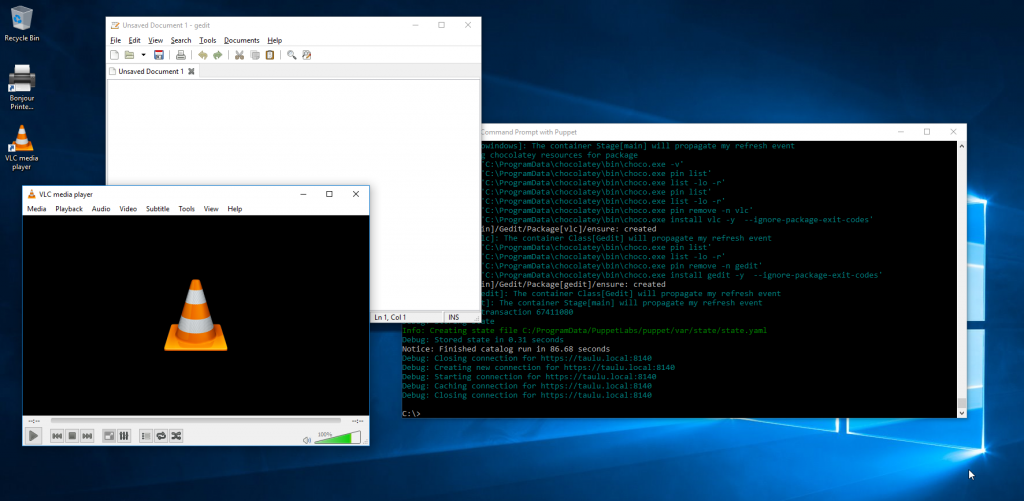
With Puppet, managing Windows is great a breeze tolerable more tolerable. For example, you can install software just by listing the names.
Windows 10 installation is full of surprises. One of them:
“Windows Setup” “The installation was cancelled” “Any changes made to your computer won’t be saved” “Windows Setup” “Windows could not update the computer’s boot configuration. Installation cannot proceed.” “OK”
Of course, Linux works normally on this computer. What doesn’t fix this: the problem persists even after using Linux live USB to zero the first gigabytes of disks (dd) and formating the disk to GPT with parted. Oh, Windows!
If you are in lab, where are several master running with same name (master.xxxxx.xxxxxx.fi), you might have to edit hosts file in windows also. It can be found C:\Windows\System32\Drivers\etc.