This is a static mirror of Péter Takács 2013: Työasemat ja tietoverkot - Linux


Péter Takács

Getting started with Linux trough trial and error

How to setup up and manage SSH & Setup LAMP to different users

As always, the first thing I do is to update the reposites.

$sudo apt-get update

1. Installing SSHserver + our first user

After that is done, I download the openssh-server so my computer can be host.

$sudo apt-get install openssh-server

The setup is done. Now I need to set up some users. It is important to name your users so you can identify them. Please note – you can only add users if you are sudo. I give myself a test account which includes my name with the command:

$ sudo adduser petertak23

Screenshot - 09262013 - 03:06:49 PM

It will ask a password. Insert here a STRONG password. Its recommended to opt your user to change this password in the first login. I chose a stupidly complex password y]H}ZxtvhzBzR8x.
You need to type the password twice, making sure you remember it.

After submitting the password, adduser ask me personal info. All of these are optional but Full Name field is highly advisable. I enter my own name Peter Takacs and press ENTER severals times to insert null to the other information.

2. Connect via SSH

I have now credidentals which I can use to test SSH with. First check my IP-address with ifconfig

$ifconfig

Screenshot - 09262013 - 03:21:21 PM

We take IP-address from the eth0 part of the information. My IP in this situation is 84.251.114.155. You can also test your connection with localhost but that would be reduntant. I connected to my ssh server with the command ssh[username]@[remote-server]

$ssh petertak23@84.251.114.155

First time you connect to SSH, it will warn you that the athenicity of the host cant be established. After your first login it will remember the connection from this point on. This is to prevent others pretending to be your server. I answered yes and proceeded to insert the password I just gave myself for my test account.

Screenshot - 09262013 - 03:26:48 PM

Now we are connected to the remote server with SSH. In real life, the user should change his password after first login. As a user, this is done by command passwd

$passwd

Repeat the password twice as in the last phase. Once your done, type exit so you can logout from SSH.

3. Installing and configuring apache2

As demonstarted in the last post, you can setup the apache2 web server with ease. I now want for my users to have their own apache2 directories. To do this we use the a2enmod userdir module.

$sudo apt-get install apache2
$sudo a2enmod userdir
$sudo service apache2 restart

The place where apache2 check your public_html folder is now in the users home folder. It is important to make the public_html and all of its content with the user, no sudo. So we connect with SSH to our remoteserver with out testuser

$ssh petertak23@84.251.114.155

Now we make a directory called public_html and place a example html page inside it.

@mkdir public_html
@cd public_html/
@nano index.html

Screenshot - 09262013 - 03:47:55 PM

Note – here you can see that I have a habit of checking the contents of the directory I am in with ls. You should too.

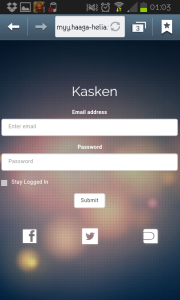
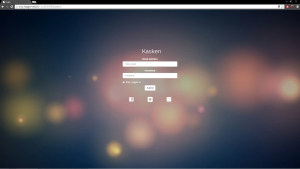
Now add a test html-page. I used Tero Karvinen HTML short from terokarvinen.com

<!doctype html>
<html>
<head>
	<title>Tero's Test Page</title>
	<meta charset="utf-8" />
</head>
<body>
	<h1>Tero's Test Page</h1>
	<p>Let's test UTF-8 with "päivää"</p>
</body>
</html>

Save and exit. Test that the page is working by typing in your browser field [yourip]/~[user]

http://84.251.114.155/~petertak23/

Screenshot - 09262013 - 03:52:41 PM

4. Priviledges and logs

As I said in the previous chapter, you need to make sure that the public_html folder and it contents are made by the user, not sudo. To check this, use the command ls -l

ls -l

-rw-rw-r– 1 petertak23 petertak23

Screenshot - 09262013 - 03:55:59 PMAs you can see, the files is made by out test user ‘petertak23′. This also shows UNIX priviledges. In our case, user and groups can read and write this file. Others can only read this file. For more understanding on UNIX priviledges and chmod, refer to man chmod, or this page.

We need to keep track on what going on in our server. As sudo, navigate to your auth.log. It can be found in /var/log

cd /var/log

I use grep command with optional -i syntax to find upper/lowercase letter. I use grep to see what my test user have been up to.

grep -i petertak23 auth.log

Screenshot - 09262013 - 04:10:17 PM

To further explain this, here is a few examples with comments

SSH

Failure

Sep 25 15:55:26 xubuntu sshd[7773]: pam_unix(sshd:auth): authentication failure; logname= uid=0 euid=0 tty=ssh ruser= rhost=dsl-hkibrasgw3-54fb72-155.dhcp.inet.fi user=petertak23

Sep 25 15:55:28 xubuntu sshd[7773]: Failed password for petertak23 from 84.251.114.155 port 43977 ssh2

### WRONG PASSWORD FROM IP 84.251.114.155 USING PORT 43977 VIA ssh2

Sep 25 15:55:37 xubuntu sshd[7773]: PAM 2 more authentication failures; logname= uid=0 euid=0 tty=ssh ruser= rhost=dsl-hkibrasgw3-54fb72-155.dhcp.inet.fi  user=petertak23

### PASSWORD WRONG 3 TIMES

Succes

Sep 25 15:57:27 xubuntu sshd[7822]: Accepted password for petertak23 from 84.251.114.155 port 44031 ssh2

### SUCCESFUL LOGIN FROM 84.251.114.155 USING PORT 44031 VIA SSH2

Sep 25 15:57:27 xubuntu sshd[7822]: pam_unix(sshd:session): session opened for user petertak23 by (uid=0)

### STARTED SESSION

Sep 25 16:03:30 xubuntu sshd[7822]: pam_unix(sshd:session): session closed for user petertak23

### USER LOGOUT

Using SUDO

Failure

Sep 25 16:10:06 xubuntu sudo: petertak23 : user NOT in sudoers ; TTY=pts/4 ; PWD=/home/petertak23 ; USER=root ; COMMAND=/usr/bin/apt-get install gedit

### USER PETERTAK23 IS NOT SUDO, CAN’T EXECUTE COMMAND APT-GET INSTALL

Succes

Sep 25 16:15:34 xubuntu sudo:  xubuntu : TTY=pts/2 ; PWD=/var/log ; USER=root ; COMMAND=/usr/bin/apt-get install vlc

### COMMAND APT-GET INSTALL, USER SUDO

Sep 25 16:15:34 xubuntu sudo: pam_unix(sudo:session): session opened for user root by xubuntu(uid=0)

### OPENUP SESSION FOR USER SUDO

Sep 25 16:16:04 xubuntu sudo: pam_unix(sudo:session): session closed for user root

### CLOSE SESSION – FINISHED INSTALLING

BONUS

xubuntu@xubuntu$

ssh-keygen
enter
enter
enter

ssh-copy-id -i ~/.ssh/id_rsa.pub 84.251.114.155

ssh petertak23@84.251.114.155

Asymmentric Encryption

http://cheateinstein.com/wp-content/uploads/2012/11/AsymmetricEncryption_March-2010.gif

Sources:

Tero Karvinen’s lessons in Haaga-Helia University of Applied Sciences

torax@IRC for translating Finnish.

NOTE: All images (if any) used on this post were self-taken.

“This document can be copied and modified under the conditions of GNU General Public License. http://www.gnu.org/licenses/gpl.html

Installing PHP and MySql to Apache2

1. Installing Apache2

I started by updating reposites so I have the most up-to-date version.

$sudo apt-get update

Installed Apache2

$sudo apt-get install apache2

I needed to change the location from /var/www to my home direcory. We do this by using a command from a2enmodule.

$sudo a2enmod userdir

After doing any system changes to mine Apache2-web server, I restart for the changes to take affect.

$sudo service apache2 restart

All done !

2. Installing php5

Installed php5 as a module for apache2

$sudo apt-get install libapache2-mod-php5

php5 is disabled by default, so I needed to change the config file. The config file can be found in /etc/apache/mod-enabled/php5.conf. I edit the file with sudoedit

$sudoedit /etc/apache2/mods-enabled/php5.conf

I added comment lines (#) to the left to prevent config file from executing the code. Modified .conf file should look like this

Screenshot - 09242013 - 02:05:13 PM

I restarted apache2 for good measure.

$sudo service apache2 restart

Now I need to test if php works. Make a ‘public_html’ folder in your home directory and a test.php file inside it.

$mkdir public_html

$nano toimiiko.php

Tested php with this hello world

<?php
print(“Hello”);
?>

Type ‘localhost/~[username]‘ replacing username with your username

localhost/~xubuntu

Screenshot - 09242013 - 02:13:24 PM Screenshot - 09242013 - 02:13:41 PM

3. Installing MySql

Installed mysql with this command

$sudo apt-get install mysql-server

Screenshot - 09242013 - 02:34:40 PM

During this information a screen will popup asking for the root password. Write something here so you can remember it when connecting to your mysql.

Installed phpmyadmin

$sudo apt-get install phpmyadmin

Screenshot - 09242013 - 02:36:53 PM

A windows asks what to configure. I select apache2 by pressing spacebar and hit enter.

In the next window phpmyadmin ask should it configure automatically. I chose <Yes> by pressing enter. After this I insert the password I just made up in the previous step.

Finally. the program will ask a another password to register with the data server. I left this blank to ensure password strentgh as this is random generated. Just press enter and it will finish the installation.

Finally, once I have installed all the component I restart apache2 once again.

4. Errors in php and valuating errors from the log

Made a error with php by typing the code in the previous step and deleted ); from the end of line 3

<?php

##INCORRECT,MISSING );
print(“Hello”
?>

Refreshed the page and the page is empy. From this I deduct that a error has occured. Navigated to the directory and viewed the error log with less command:

$cd cd /var/apache2

$less error.log

Screenshot - 09242013 - 02:53:08 PM

[Tue Sep 24 14:46:23 2013] [error] [client 127.0.0.1] PHP Parse error:  syntax error, unexpected ‘?>’ in /home/xubuntu/public_html/toimiiko.php on line 3, referer: http://localhost/~xubuntu/

From this I figure that forgetting the correct syntax breaks the code. wow.

5. Make a Table with phpmyadmin

Type in your browser

localhost/phpmyadmin

user is root and password is the password you inserted when you setup MySQL
Screenshot - 09242013 - 03:13:49 PMGo to Databases and create a database as follows:

Screenshot - 09242013 - 03:14:20 PM

We have now added a database ! Lets insert a table with create a table. I set row to 5 and addd the following values.

Screenshot - 09242013 - 03:18:47 PM

6. Insert INTO , SELECT and DELETE

Screenshot - 09242013 - 03:57:09 PM

Screenshot - 09242013 - 03:57:25 PM

FORM

<form id=”lomake” method=”post” action=”<?php $_SERVER['PHP_SELF']; ?>”>
<div>
<label for=”user”>User</label>
<input type=”user” name=”user” placeholder=”User”>
</div>
<div>
<label for=”headline”>Headline</label>
<input type=”text” name=”headline” placeholder=”Headline”>
</div>

<div>
<label for=”body”>Text</label>
<textarea name=”body” rows=”3″></textarea>
</div>

<button type=”submit” name=”submit” value=”submit”>Submit</button>
</form>

PROCESS

if (isset($_GET['id'])){

$del_id = $_GET['id'];

mysqli_query(“DELETE FROM news WHERE id = ‘$del_id’”, $con);
mysqli_query($con,”DELETE FROM news WHERE id = ‘$del_id’”);
$result = mysql_query(“SELECT * FROM news ORDER BY id DESC “, $con);

}
#####

if(isset($_POST['submit'])) {

$user = $_POST['user'];
$headline = $_POST['headline'];
$body = $_POST['body'];
$bodybr = nl2br($body);

mysqli_query($con,”INSERT INTO news (stamp, user, headline, body) values (NOW(),’$user’, ‘$headline’, ‘$bodybr’)”);

View NEWS

echo ‘<div id=”lol”>’;

$result = mysqli_query($con,”SELECT * FROM news ORDER BY id DESC”)
or die (“Tietokannan tietoja ei voitu valita.”);

if($result) {

while($row = mysqli_fetch_array($result)){

echo ‘<tr>’.”\n”;
echo ‘<div id=”news”>’;
echo ‘<div id=”newsheadline”><h2>’.$row['headline']. ‘</h2></div>’;
echo ‘<div id=”newsbody”>’.$row['body']. ‘</div>’;
echo ‘<div id=”newsfooter”> posted by ‘.$row['user'].’&nbsp;’.$row['stamp']. ‘</div>’;
echo ‘</div>’;
?>

<td valign=”top”><a href=”<?php $_SERVER['PHP_SELF']; ?>?id=<?php echo $row['id'];?>”><span></span>
</a></td>


Sources:

Tero Karvinen’s lessons in Haaga-Helia University of Applied Sciences

NOTE: All images (if any) used on this post were self-taken.

“This document can be copied and modified under the conditions of GNU General Public License. http://www.gnu.org/licenses/gpl.html

Login Page with Bootstrap

Finished product

 kasken

Mobile

2013-09-20 01.03.47

Apache2 Web Server

Installing Apache2

First I opened up terminal and updated the reposity.

$sudo apt-get update

Installed Apache2.

$sudo apt-get install apache2

You can test that you installed apache2 correctly by typing ‘localhost’ to your web-browser. The page should look like this.

Screenshot - 09182013 - 04:26:48 PM

Configuring Apache2

Now you need to configure apache to a folder of my choosing. To do this, we are going to use userdir module. More info can be found in the Apache documentation

$sudo a2enmod userdir

This will result in the following line:

Enabling module userdir.
To activate the new configuration, you need to run:
service apache2 restart

Lets do just that

$sudo apache2 restart

The correct to place your website is now your homedirectory. Now we need to make a folder called ‘public_html’ and place our site there. Make sure you are in your home folder and make a dir with

mkdir public_html

Go inside the folder

cd public_html

Now put your website here. You can test if the server is working correctly by placing any file to this folder, but for now I made a validator-proof website with the following code

<!DOCTYPE html>
<html lang=”en”>
<head>
<title>Page title goes here</title>
<!– define charset –>
<meta charset=”utf-8″ />
</head>
<body>
<h1>Heading goes here</h1>
Text goes here
</body>
</html>

Use this or make your own html code and name it index.html and place it in the public_html folder.

Now remember, the folder is in the current users home directory, so you have to add the users name to the web-address to view it. Assuming your username is ‘xubuntu’, in the browser field type

localhost/~xubuntu

Now this is great and all but you want to release your page to the public. To do this, just replace your localhost with your IP-address. In my case:

http://84.251.114.155/~xubuntu/

To view your IP address, in terminal give the command ‘ifconfig’

Screenshot - 09182013 - 04:59:06 PM

Next post will cover how to make basic styling with bootstrapper.css and how to explore your apache error log.

kasken

NOTE: All images (if any) used on this post were self-taken.

“This document can be copied and modified under the conditions of GNU General Public License. http://www.gnu.org/licenses/gpl.html

Installing programs with the Terminal continued

First I ran the command to update reposities with the following command

$ sudo-apt-get update

This ensured that when I install programs from the reposity they are the newest version. Programs can leave or add depencies on different version, so this let me download exactly what I need – no more, no less

For this excercise, I wanted to download different command-line programs but didn’t know already any. I searched the reposity with this

$ apt-cache search [searchword] [[searchword]

Note, that you don’t need to be sudo for this. You can add one or more searchwords to further narrow down your search.

I wanted to find a youtube downloader, so I put the command apt-cache search youtube. I haven’t heard from any of these, so I wanted to extract more information before installing.

$ apt-cache show youtube-dl

This showed me information about the program – I felt more confident downloading the program. To install, as covered in the last excerise

$ sudo apt-get install youtube-dl

Screenshot - 09162013 - 02:03:20 PM

Terminal read the package information, asked me if I am really sure, pressed y and program started downloading and installing.

After its finished, to start the program I typed youtube-dl in the terminal

Usage: youtube-dl [options] url [url...]

youtube-dl: error: you must provide at least one URL

Okay, now I had a understaning how to use this program. I headed to youtube.com and picked a video for testing purposes. apt-cache show showed me information that the selected video will be downloaded in the highest available quality unless otherwise stated.

$ youtube-dl http://www.youtube.com/watch?v=oDAw7vW7H0c

This downloaded the video file in .mp4 format to my current working directory. I give the command ls to see what files/folders are the direcory I am in. But now I had a problem. I had the video, but how do I play it? For this I installed my preferred video player VLC.

$ sudo apt-get install vlc

After this is finished, I had both the player and the video I wished to play, just open the video by typing vlc [filename]:

$ vlc oDAw7vW7H0c.mp4

Remember to use TAB key to fill in the rest, this would be hard to type correctly on your own.

I installed one more program to good measure.

I picked fmtools to listen fm radio on my xubuntu. After installing fmtools with the apt-get install fmtools the program itself is not run by the command fmtools. I found out the name using dpkg and typing:

dpkg –listfiles fmtools

Screenshot - 09162013 - 02:20:32 PM

Screenshot - 09162013 - 02:25:47 PM

I deducted that the program I can use are fm and fmscan, but when I type fmscan it said that there is no /dev/radio2 folder. After looking up manual with man fmscan and consulting with fmtools webpage I can’t get the program working. So I remove it, or any program with the command

sudo apt-get remove -y fmtools

Note that here I added a -y after remove command, which answers yes to all the annoying confirmations.

Sources:

Tero Karvinen’s lessons in Haaga-Helia University of Applied Sciences

http://linuxcommand.org/

NOTE: All images (if any) used on this post were self-taken.

“This document can be copied and modified under the conditions of GNU General Public License. http://www.gnu.org/licenses/gpl.html

Basic terminal commands – How to install trough terminal

We have now installed programs with the Xubuntu UI ! What if we would like to do the same with the terminal? Heres how:

apt-get

You can use ‘sudo apt-get install [package]‘ to install a package/program called package. For this example, we are going to install Libreoffice writer. Note that the raise you priviledges with the sudo command to install a package.

$ sudo apt-get install libreoffice-writer

NOTE that the upper/lowercase matters here. Terminal will ask you a confirmation about what different packages you are downloading. Press y and the downloading begins. After installings(for me it took about a minute) I find the Writer on the topleft ‘Appllications’ menu under ‘Office’.

Great ! You installed a program trough terminal. You can also you ‘sudo apt-get update’ to update package list from the reprosity with the newest versions and depencies.

killall

If you have ever used Windows, you are most probably used to the fact that the program is not responding. If this happens Xubuntu, you can terminate a program in the terminal as follows:

$ killall [application] Terminate an application named application. Example:

$ killall soffice.bin

This terminates an our newly installed Libreoffice. To determine the name of the process, you can either type killall and start typing what you think is the name of the process OR type killall and press tab TWICE to review all the running processes. Be careful with killall, as you may stop vital processes to your system. Most commands can me made with an optional syntax after the command. Here you can also add a -y after $killall to terminate an application and all of its processes

$ killall -y soffice.bin

To see if the command has an option, you can type help [command]

help cd

What if I dont like the program I just installed? You can remove program with the command apt-get remove [program]

$ sudo apt-get remove libreoffice-writer

This will remove Writer and its dependencies.


Sources:

http://terokarvinen.com/

http://linuxcommand.org/

NOTE: All images (if any) used on this post were self-taken.

“This document can be copied and modified under the conditions of GNU General Public License. http://www.gnu.org/licenses/gpl.html

Jokapäivän ohjelmien käyttö Linux koneella (Xubuntu)

Olin asentanut Linux koneen onnistuneesti läppärilleni. Nyt onkin sitten aika testata, kuinka ohjelmat, joita käytän joka päivä toimivat Linux-ympäristössä.

Tässä pieni lista ohjelmista joita käytän joka päivä työssäni/opiskelussa

  • Ableton Live
  • Photoshop
  • MS Office
  • Chrome
  • Steam
  • Skype

Nyt kokeilen näiden ohjelmien vapaita vastineita Linux-ympäristössä.

Muuton jäljiltä minulla ei ole enää pääsyä koneesen jolla viimeksi testasin xubuntua. Pääkoneeni kanssa oli suuria ongelmia saada xubuntu toimimaan, lähestulkoon samat ongelmat kun viimeksi. Tällä kertaa en kuitenkaan löytän bootmenua ollenkaan, joten vaihdoin biosista boot priorityn HDD -> USB. Kun pääsin valintaruutuun ruutu pim jossa voin valita joko kokeilen Xubuntua vai asennan, koneeni pimeni todellä pitkäksi aikaa. n.15min jälkeen luovutin kokonaan ja käynnistin koneeni uudestaan reset-näppäimestä. Kaikki tuntuu olevan todella hidasta, vaikka ymmärtääkseni pääkoneessani on rahkeita kovempaakin työhön. Uskon että ongelma on omassa Kingston Data Traveler Keyboard-USB, ja poltankin Xubuntun 700Mb levylle ensi tilassa.

Täysin sama virhe toistuu uudestaan täysin samassa kohdassa. Totean että joko koneeni ei vaan tykkää jostain syystä Xubuntusta, tai todennäköisemmin omasta USB. Epäilykseni USB:n toimimattomuudesta lisääntyvät kun sama ongelma tulee vielä läppärillä vastaan samassa kohdassa. Päätän käydä huomenna kaupassa hakemassa tyhjän CD-levyn koska itse en omista semmoista, ja vaikka omistaisinki kaiken muuton keskellä levyä on liki mahdoton löytää.

Koitin silti ja tuloksena seuraava: DVD. Poltin tällä kertaa uusimman13.04, Raring Ringtail (64bit) koodinimella varustetun version. Tarkka tiedostonimi oli 13.04-desktop-amd64.iso

20130902_203925

Tällä kertaa kaikki toimii kuten pitääkin ja eteen tuleekin jo tutuksi tullut Xubuntun asennus. Kone ei jäätynyt tähän kohtaan vaan pääsin testaamaan mitä alunperin tulinkin – vapaasti käytettävien ohjelmiston käyttö ja vertailu kaupallisiin paskiasiin.

Ensiksi valitsin ehkä stereotyyppisimman ohjelman, MS Office. Itse käytän myös Windows pohjalla usein Openoffice(nyk ja tästä eteenpäin Libre) joten tämä ei aivan uusi kokemus ole, hauska ja tarpeellinen kuitenkin testattava uudessa alustassa.

Screenshot - 09022013 - 06:11:22 PM

Screenshot - 09022013 - 06:11:51 PM

Käynnistän Ubuntu Software Centerin joka on paketinhallintaohjelma, josta pystyn lataamaan turvallisesti ja nopeasti ohjelmistoa. Täältä etsin Libren officen koko paketin, johon kuuluu Writer, Impress, Calc yms jotka vastaavat koko MS Office kaartia. Ohjelman asennettua kokeilen LibreWriter-ohjelmaa, jonka löydän ohjelmavalikosta “Office”-kohdan alla.

Screenshot - 09022013 - 06:15:54 PM

Ohjelma itsessaan toimii aivan kuin vastapuolensa. Kirjoitetaan tekstiä, valitaan fontti, onko teksti otsikko vai ei. Nopealla testauksella ei ainakaan toiminut syvennykset(Ctrl + M Office 2013), mutta uskon että tämäkin toiminnallisuus löytyy kunhan tutustun paremmin. Ikonit ovat selkeitä ja leikkisiä, täysin päinvastaiset kuten Office 2013 pelkistetty ja kolkko käyttöliittymä

Seuraavaksi ohjelmaksi valitsin Steamin. Tämäkin löytyy aivan samalla tavalla Ubuntu Software Centeristä. Tämän kohdalla tulee kuitenkin vastaan se, että ainoa vaihtoehto on “Buy”. Sivuutan tämän tällä kertaa hämmentyneenä ja valitsen toisen ohjelman.

Screenshot - 09022013 - 06:22:21 PM

Valitsen Chromen Linux vastikkeen ‘Chromium’, koska itse en välitä oletusselaimesta(Firefox) ollenkaan. Käyttöliittymä on aivan kuten Windows/Mac vastikkeensa, lukuun ottamatta eriväristä ikonia. Jää kysymys, onko ohjelmassa eri funktiota verrattuna W/M versioihin, sillä nimi on muutettu. Chromium ehdottaa sivun kääntämistä omalle kielellesi, netistä hakeminen googlen kautta onnistuu kirjoittamalla suoraan osoiteriville, ja Chromium laajennukset löytyvät Chrome Webstoresta. Pintapuolin en näe ainuttakaan eroa ohjelma muihin alustaversioihin.

Screenshot - 09022013 - 06:28:44 PM

Viimeiseksi valitsen Linuxin Photoshop vastikkeen ‘Gimp’ aivan siitä syystä että minulla on aina jäänyt paha maku suuhun kyseisestä ohjelmasta jo nuoruudestani ja haluan testata onko aika tehnyt hyvää ohjelmalle. Tätä ohjelmaa ei tarvitse etsia Software Centeristä sillä tämä on esiasennettu Xubuntuun.

Tulee alkuun hyvin sekavia ikkunoita, en tiedä mistä aloittaa. Valitsen File -> New ja painan next oletuskoolla. Työkaluja valitaan vasemalla olevasta laatikosta, josta löytyvät perus Brushit jonka parametrejä voi muuttaa työkalujen alapuolella. Testaan lisäämällä tekstityökalulla tekstiä, jonka layeria koitan koristella kuten Photoshopin Blendin Options. En löydä kyseistä ominaisuutta, ainut vaihtoehto minkä löysin on ‘Layer Properties’ joka vain muuttaa layerin nimen. Layer maskit tosin löydän hyvin helposti. Perustyökalut, jää silti aivan sekava fiilis mistä tapahtuu mitäkin. Olenv armaan tottunut aivan liikaa Adoben ohjelmiin

Loppuunvetona, Linuxista löytyy useimmille ohjelmille ohjelma, joka vastaa – tai on paljon parempi kuin Windows versio. Funktiot on samoilla ohjelmilla täysin tai lähes identtiset. Ohjelmilla, jotka ovat täysin eri kuin vastakappeleensa vaatii alkuun paljon opettelua, kuten varmasti aikoinaan allekirjoittaneellakin esimerkiksi Photoshopin käyttö. Xubuntu voi, ja pystyy olemaan jokaisen pääkäyttöjärjestelmä.

Seuraavasta blogikirjoituksestä lähtien alan kirjoittamaan englanniksi, koska uskon että se hyödyttää itseäni ja muita enemmän kuin se, että raapustan näitä suomeksi.

Kiitos lukemisesta ja jätä kommenttia alle asioista, jotka ei koske kirjoitusvirheitäni.

Xubuntu 12.04 LTS kokeilu ja asentaminen USB-tikun avulla

Levykuvan lataus

Tämä on raportti kuinka onnistuin asentamaan Xubuntu 12.04 LTS -käyttöjärjestelmän kannettavaan joka keräsi pölyjä kaapissa. Koekaniinin nimi on Acer Aspire 9300.

Ensiksi haetaan Xubuntu 12.04 image osoitteesta http://xubuntu.org/getxubuntu/ Tällä kertaa valitsin 32-bit version, koska en ole aivan varma onko läppäri 32 vai 64. Vaihtoehtoina tässä on ladata joko torrentina tai suoralatauksessa, nyt valitsin ensimäiseksi mainitun. Tähän menee yleisesti norminopeuksilla 5-20min ja levykuvan tarkka nimihän oli xubuntu-12.04.3-desktop-i386.iso.

Kun tiedosto on latautunut, pitää meidän viedä se tikulle oikeassa muodossa. Itse tein tämän pistämällä oman Sandisk 8gb muistin Xubuntu koneeseen kiinni, jonka jälkeen valitsin valikosta Startup Disk Creator. Tästä valikosta valitaan ‘Other…’ painike, jonka jälkeen osoitetaan juuri lataamaamme levykuvaan. Jos sinulla on Mac tai Windows, tälle on vastaavia ohjelmia kuten UNetbootin http://unetbootin.sourceforge.net/ joka tekee täysin saman asiaan. Tutustu kyseisten ohjelman ohjeistukseen, mutta toimintapa ei eroa paljon tästä.

Startup Disk Creator

Kun olin valinnut levykuvan, valitsin myös määränpään minne levykuva poltetaan. Kone tunnisti suoraan Kingston DT USB-tikkuni. Kaikki hyvin, painetaan ‘Make Startup Disk’. Tämän jälkeen kone mietti todella pitkään, n 10min. Ikkuna popsahtaa ja sanoo että kaikki onnistui, loistavaa !

Testaus

Kaikki valmista ! Nyt sitten testailemaan. Kohdekoneeni oli mainitsemani Acer Aspire 9300. Pistin USB tikun koneeseen, jonka jälkeen käynnistin koneen. En nähnyt näppäintä jolla pääsen boot menuun, joten painoin F2 – SETUP. Eteen ilmestyi BIOS, mutta täältä en löytäny apua miten pääsen boottaamaan livecd/tikun. Lähdin pois tallentamatta.

Kone käynnistyi uudestaan ja tällä kertaa jäin odottamaan jos boot menu olisikin valittavissa käynnistyksen loppuvaiheessa. Ei ollut. Käynnistin vielä kerran.

2013-08-29 21.16.52Ongelmaani koitin löytää ratkaisua BIOSista, josta pienen selailun tuloksena huomasin että boot menu F12 on poistettu käytöstä kokonaan. Tämä päälle jonka jälkeen tallensin muutokseni ja käynnistin koneen uudestaan.

2013-08-29 21.19.29Kas kummaa, nyt kone ehdotti käynnistäessä boot menua. Valitsin asennuksen USB-tikusta jonka tunnistan tikun valmistajasta. Näyttö oli pimeänä hetken aikaa, jonka jälkeen tuli Xubuntu latauspalkki näkyviin. Tämän jälkeen Xubuntu kysyi minulta kieltä, sekä haluanko kokeilla Xubuntua(Try Xubuntu) vaiko asentaa se kokonaan (Install Xubuntu). Valitsin Englanti ja Try Xubuntu, jonka jälkeen kone mietti n.5min.

Screenshot - 08292013 - 09_15_15 PM

Työpöytä tuli esille. Kaikki näyttäää hyvältä. Avaan web selaimen ja kokeilen internettiä. Internet ei toimi. Oletinkin näin, koska en ollut kytkenyt verkkopiuhaa kannettavaan kiinni.
Oikeasta yläkulmasta löydän 2 nuolta, josta löydän lähellä olevat Wlan tukiasemat. Löydän omani ‘arany’ samantien. Yhdistettyäni tukiasemaan, päivitän selaimen ikkunan ja google avautuu.

Kun olin varmistanut että netti toimii, on näppäimistön vuoro. Tässä tapauksessa näppäimistö toimikin automaattisesti, mutta tässä ohjeet kuinka tämä vaihdetaan. Vasemmasta yläkulmasta valikkoon -> Settings -> Settings Manager.Valitaan Keyboard, jonka jälkeen välilehdista kohta Layout. Unboxataan ‘Use System Defaults’. Valitaan Keyboard Layouts kohdasta kieli (olettettavasti englanti) alapainikkeesta edit jonka jälkeen valitaan Finnish.

Noniin ! Xubuntu pyörii, netti toimii ja näppäimistökin suoltaa oikeaa kieltä ! Seuraa blogiani kun tutustun tarkemmin Linuxin ihmeellisen maailmaan !

Kiitos

Follow

Get every new post delivered to your Inbox.