Install Debian on Virtualbox - Updated 2024
Install Debian Linux on VirtualBox. You can play with Linux even on Windows, before you completely move to Linux.
This is a beginner friendly tutorial, with quazillion screenshots.
Download Debian ISO image
Download the current Debian ISO image. You can find it by Googling/Duckducking "debian live iso".
Image links keep updating as new Debian versions are published, at the time of writing this was debian-live-12.6.0-amd64-xfce.iso. You can find the latest ones in live amd64 folder on cdimage.debian.org. If one server is too busy, just use a mirror, such as 1, 2, 3. You can also download Linux images from Torrent peer-to-peer network.
The screenshots below are from Debian 10, the new 12 might have minor differences.
The correct image is
- live - Can boot from image and use Linux even without installing. Some Linux distributions call live images desktop images.
- 12.x.x - The distribution version, which locks major versions of most software, while providing security updates.
- amd64 - Most regular desktops, laptops and servers are amd64. Also Intel processors use amd64 architecture.
- xfce - my favourite desktop environment. Obvious and simple, but also easy to configure if you want. The other ones work fine, too.
Debian live iso is a typical Linux iso, so it's a couple of gigabytes and takes a while to download.
Here are some tips if you are using M1 or M2 Mac.
Create a New Virtual Machine
Install VirtualBox if you don't have it yet. If you're running Linux, it's usually just 'sudo apt-get update && sudo apt-get -y install virtualbox'. If your current computer (host) is Windows or OSX, download VirtualBox installer and run it.
Start VirtualBox. From the menus, select Machine: New...
Note: for latest VirtualBox in Windows, you must choose "Expert install" and "Skip Unattended Install". In my tests, installation did not run with Virtualbox "Unattended Install", and you could only select both "Skip Unattended Install" and "Debian (64-bit)" in "Expert mode".
- Machine: New...
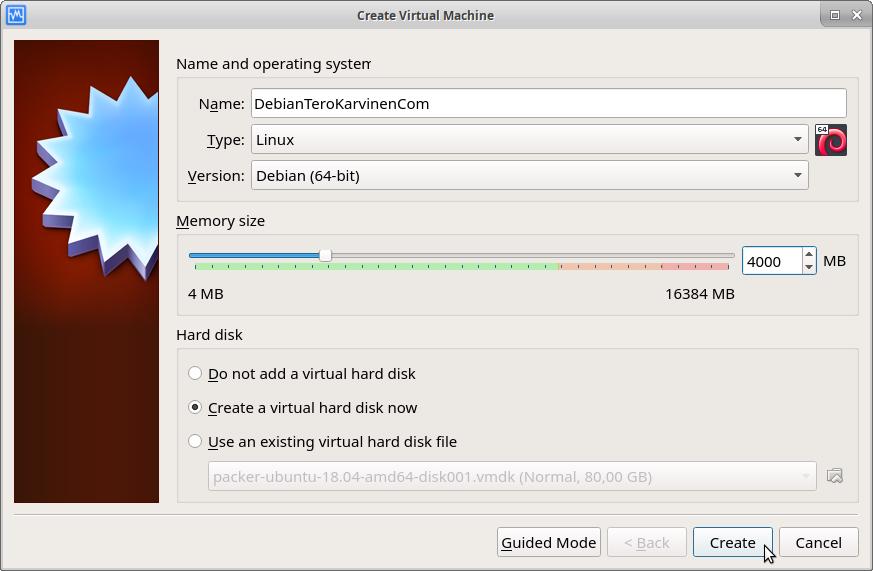
- "Create Virtual Machine", click "Expert Mode" to get all questions in one screen
- Name: DebianTeroKarvinenCom
- Type: Linux
- Version: Debian (64-bit)
- Memory Size: 4000 MB (more is better if you have enough RAM, 2000 MB could work)
- Hard disk: Create a virtual hard disk now - yes
- Click "Create"
- "Create Virtual Machine", click "Expert Mode" to get all questions in one screen
- "Create Virtual Hard Disk"
- File size: 60 GB
- Defaults are good for others (File location: DebianTeroKarvinenCom, Hard disk file type: VDI (VirtualBox Disk Image, Storage on physical hard disk: Dynamically allocated)
- The disk is "dynamically allocated", so it only takes as much disk space as the contents. So it's a good idea to choose a large disk. If you just store 10 GB, it only takes 10 GB on your host OS (real computer).

You can now see a new virtual machine on the left in VirtualBox Manager.
Insert Debian ISO Image as a Virtual CDROM
Select your VM "DebianTeroKarvinenCom" and click "Settings".
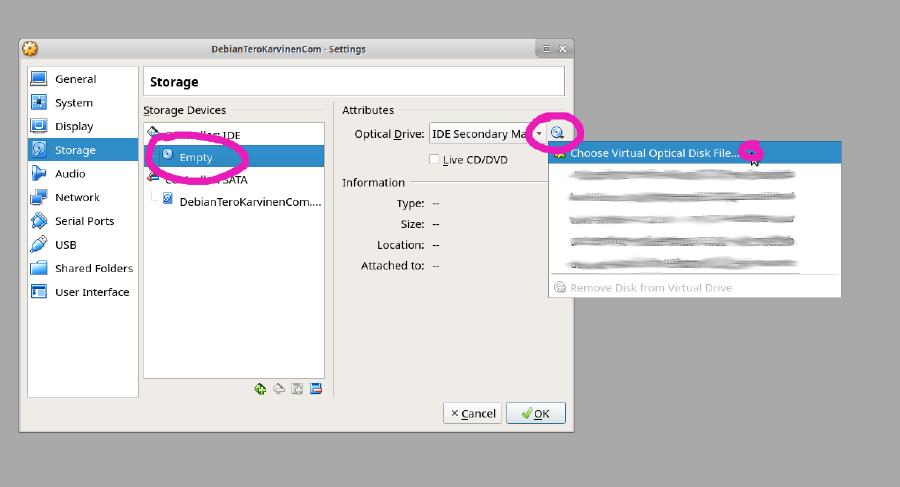
- "DebianTeroKarvinenCom - Settings", Storage tab
- Under "Controller: IDE", choose the CDROM "Empty"
- On the right, under "Attributes", beside "Optical Drive:" "IDE Secondary Master", click the tiny CDROM icon to open a menu
- Choose Virtual Optical Disk File...
- Find and select your ISO disk image (debian-live-10.7.0-amd64-xfce+nonfree.iso)
You now have a virtual computer, with a virtual CDROM in a virtual drive. We're ready to boot.
Boot to Desktop - Choose to Live
On VirtualBox Manager, double click your new virtual machine DebianTeroKarvinenCom to boot it.
Bootloader appears. In addition to this cool menu, bootloader is also responsible for loading the kernel - in this case, the Linux kernel.
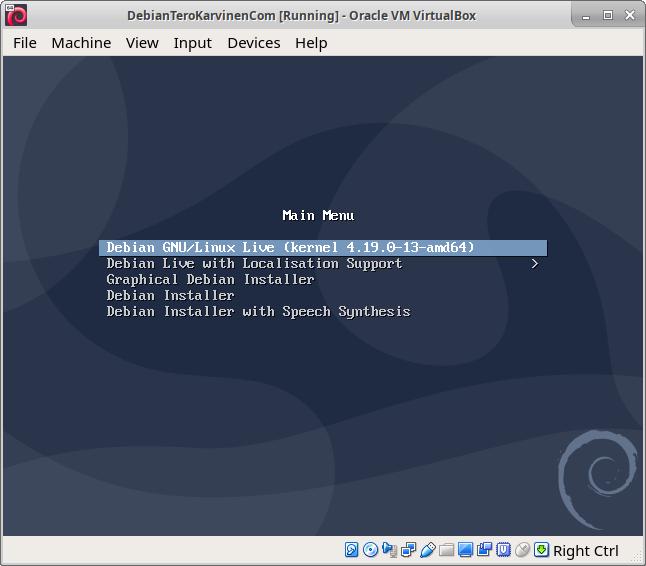
Choose to Live. That's the default option, and it's chosen automatically if you just wait a couple of seconds. Usually, you should boot to live desktop even if you're going to install. That way, you can test Linux before you decide to install. And often the installer on Live mode is faster than the other installers.
A live desktop appears. Do you mean you can use Linux without installing? Yes.
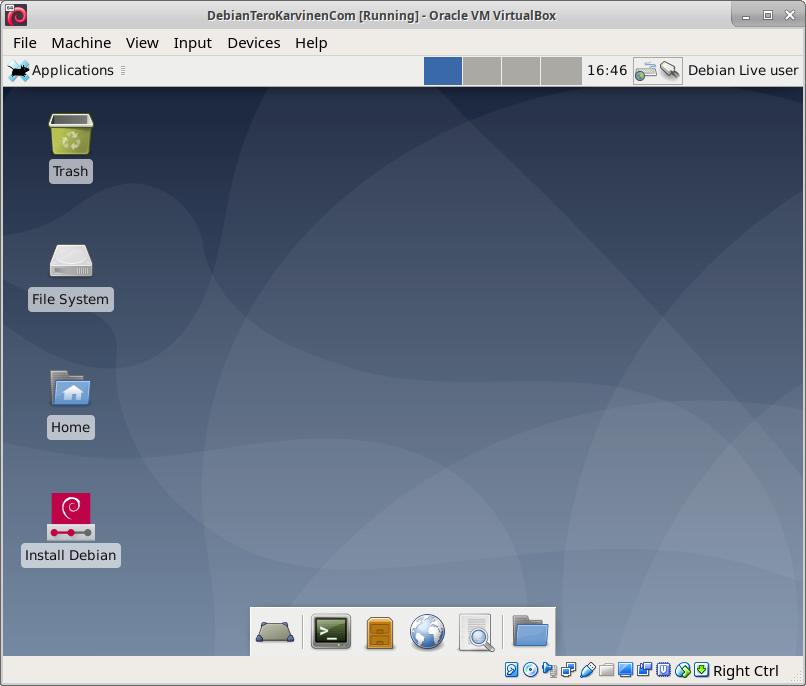
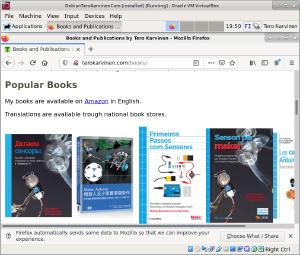
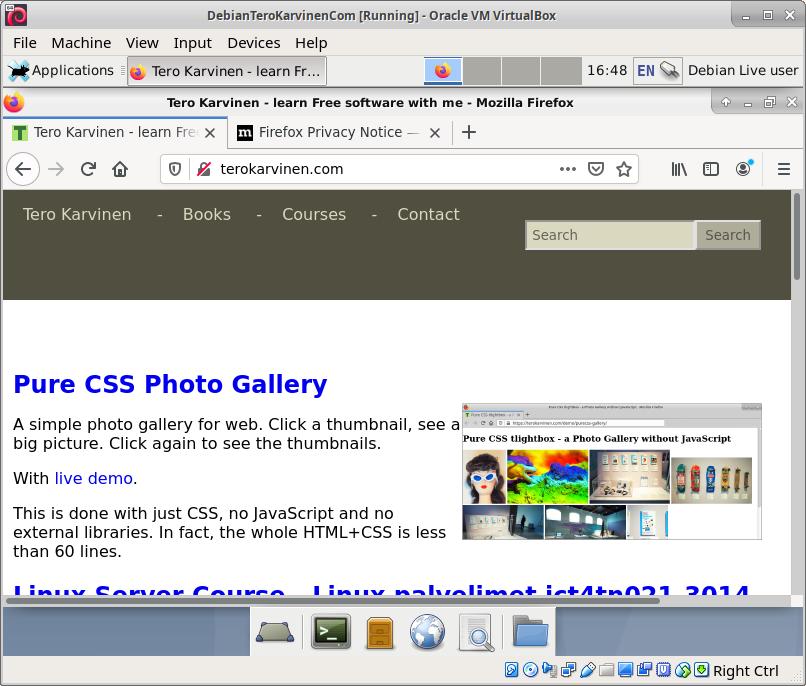
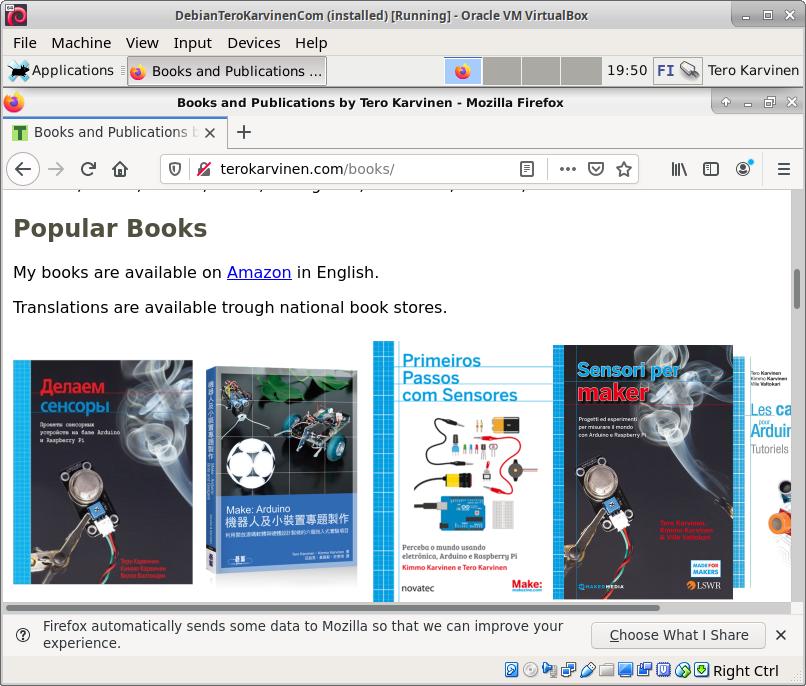
Let's test that everything works. On top left, open "Applications" menu, choose "Web Browser". I googled "Tero Karvinen", clicked the top link and saw my homepage. Then I closed the browser. This tests the basic functionality of mouse, keyboard, network and display.
Run the Installer - and Use a Good Password
Backups? On a real computer, this would be the time to check that we have backups. But this is an empty virtual machine.
Run the installer, it's on the bottom left of the desktop: "Install Debian".
On "Debian GNU/Linux Installer" (Calamares)
- Welcome: Language: American English (Administration and software developemnt should be done in English. You can install more languages for your users later.)
- Location: Finland (click it on the map)
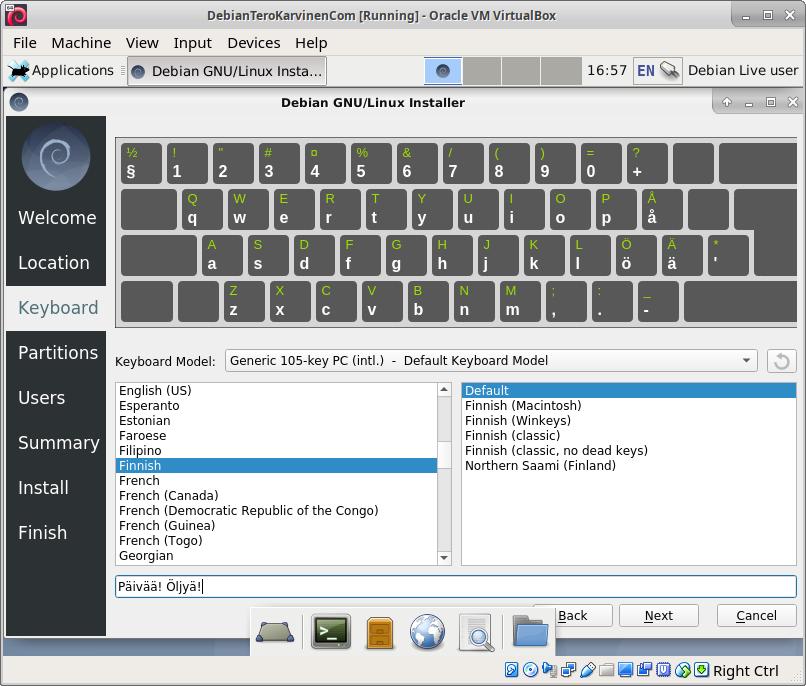
- Keyboard. Choose the keyboard you have.
- If you're in Finland, use these settings: Keyboard Model: "Generic 105-key PC (intl.) - Default Keyboard Model"; "Finnish", "Default". You can test it by typing some Finnish on the test space, preferably something with scandic letters ÅÄÖ.
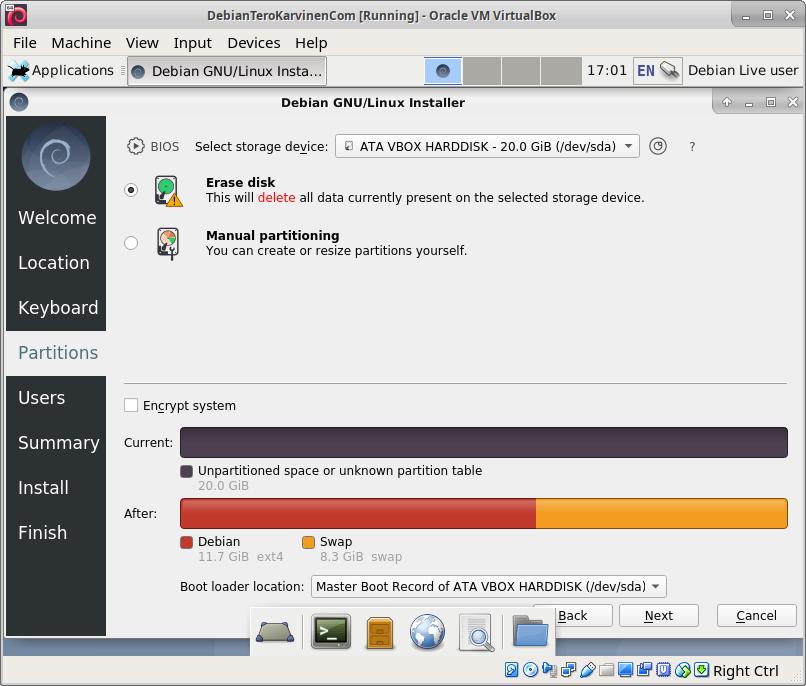
- Partitions:
- Erase disk: yes (this is the most reliable option, as any junk left by previous operating systems gets deleted. Also deletes everything else on your virtual disk)
- Encrypt: no (Because this is a virtual computer. For any real computer like a laptop or a desktop, yes, encrypt, and use a good password)
- Boot loader location: "Master Boot Record..." (It must be on master boot record MBR, or the computer doesn't boot. Is this a trick question?)
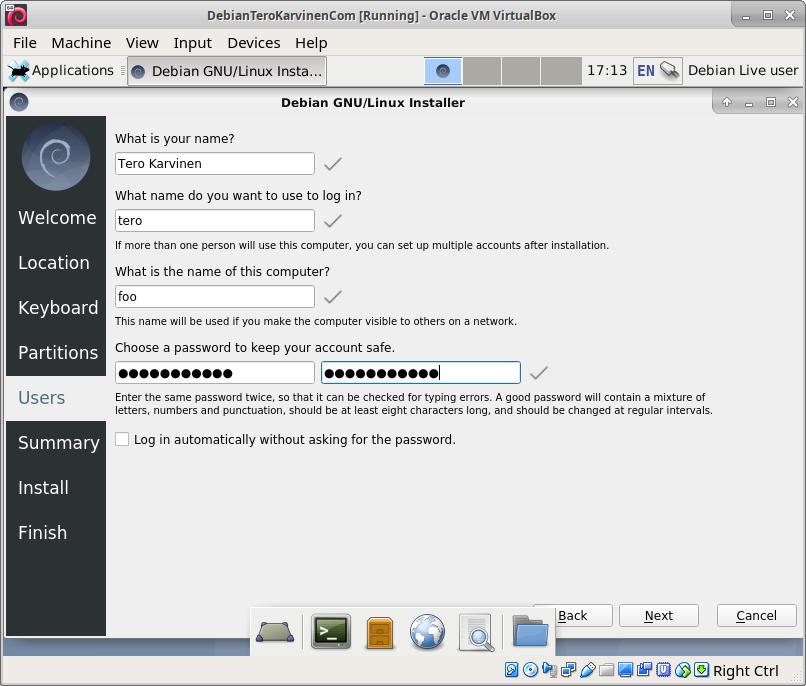
- Users (This user will get unlimited powers on this computer with sudo)
- "What is your name?": Tero Karvinen (aka "Real name". Use your own full name. Special characters are allowed, Åke Vähäkäähä)
- "What name do you want to use to log in?" tero (max 8 chars, must start with lowercase ASCII letter a-z, may only contain lowercase letters and numbers a-z0-9)
- "What is the name of this computer?" foo (Don't put your name, your organization or system description here. In some networks, this becomes your public domain name)
- "Choose password to keep your account safe." Use a good password. Never use a bad password. Use password manager as needed. At least 9 characters. Letters "abc", numbers "123", special characters "&(*$". But no national characters like Ä and Ö.
- "Log in automatically without asking for the password" No.
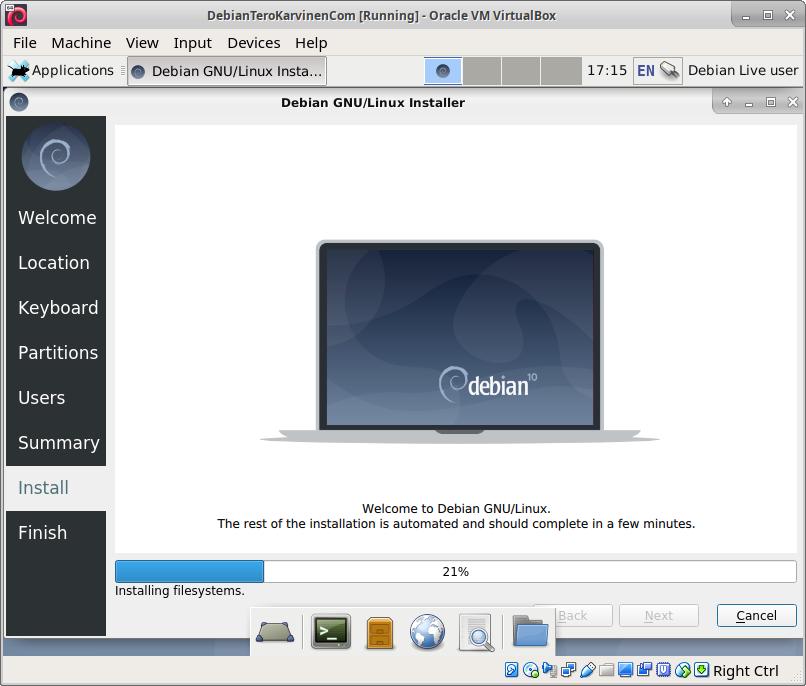
- Summary
- Backups - On a real (non-virtual) computer, this would be the last moment to remember the backups. We could just reboot, remove the Linux USB stick, and boot to our previous computer.
- Click "Install".
- Wait for 10 minutes while the system installs. Now is a good time to do a few push-ups.
- "All done." "Restart now" - Yes. Click "Done."
Solve a Black Screen with xforcevesa (optional)
On my system, the virtual machine just booted to a black screen. As most of my students don't see this problem, maybe it's just me. So if you see a login screen, just log in and enjoy your machine.
Update: You can skip to First Login if it works. If it asks for your login and password, it works.
Here is a nice trick for black screens: xforcevesa. I have also used this with tricky physical computers giving me black screen.
Reboot (Machine: Reset). Keep clicking ESC while the computer boots, so that you land on GRUB Bootloader menu. If you miss it, just reboot and ESC harder.
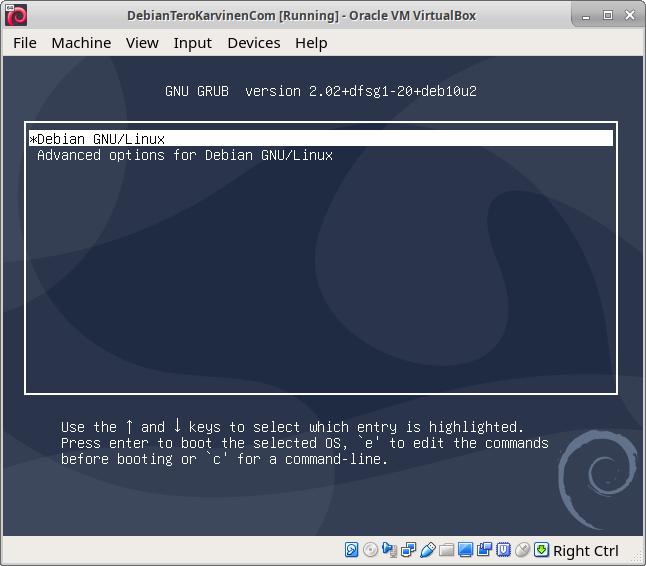
On the default option "Debian GNU/Linux", click "e". Update: In Debian 11, use TAB instead of e to edit GRUB options. Find the line that starts with "linux". Add the boot parameter " xforcevesa" to it. Press control-X to boot.
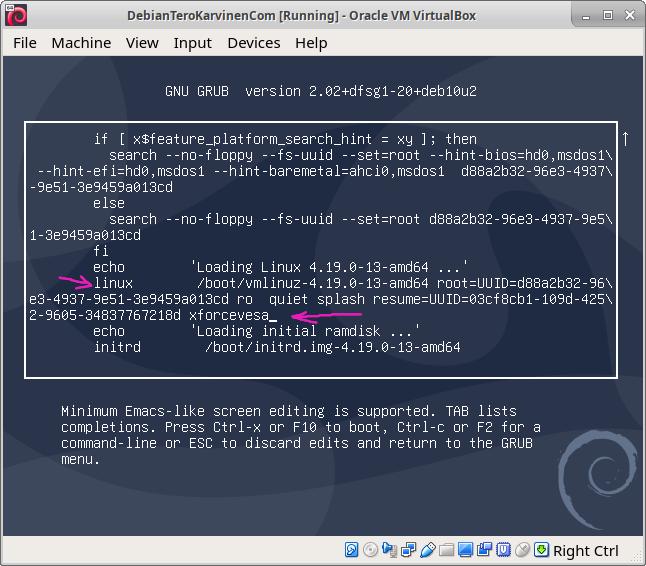
What does xforcevesa mean?
- X - the Linux grahical user interface
- force - use this even if Linux thinks it could do better
- VESA - a very simple way for talking to display
The boot start. In my case, I immediately noticed changes compared to black screen problem. I could see a text cursor blinking, then some funny letters and finally, the login screen. Thanks, xforcevesa!
Update: The few black screens I've seen were solved with xforcevesa trick above. If that does not help and you're feeling advanced, you can try: alt-ctrl-F1 for text mode console (use left ctrl, right ctrl is reserved by VirtualBox). Update all packages, install VirtualBox guest additions, then reboot. If nothing else helps, you could try with a different distribution, such as the latest Xubuntu.
First Login
A login screen greets you. Type your login name and your password. They are the ones you chose in the installer.
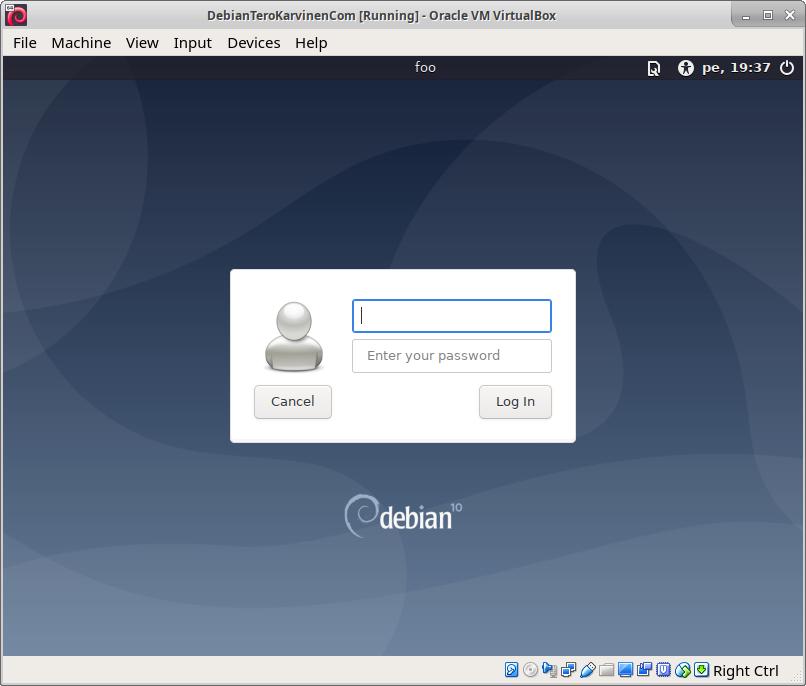
You're in!
"Welcome to the first start of the panel": "Use default config".
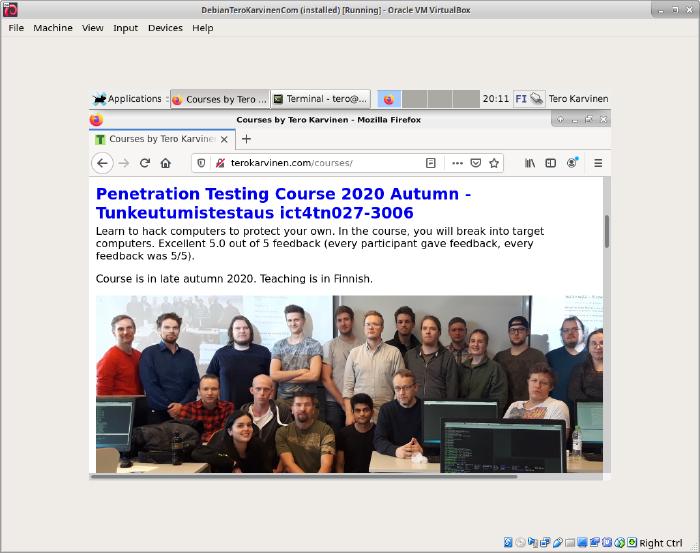
Now you can try browsing the internet to verify that everything works.
Well done! You've installed Debian.
First Steps
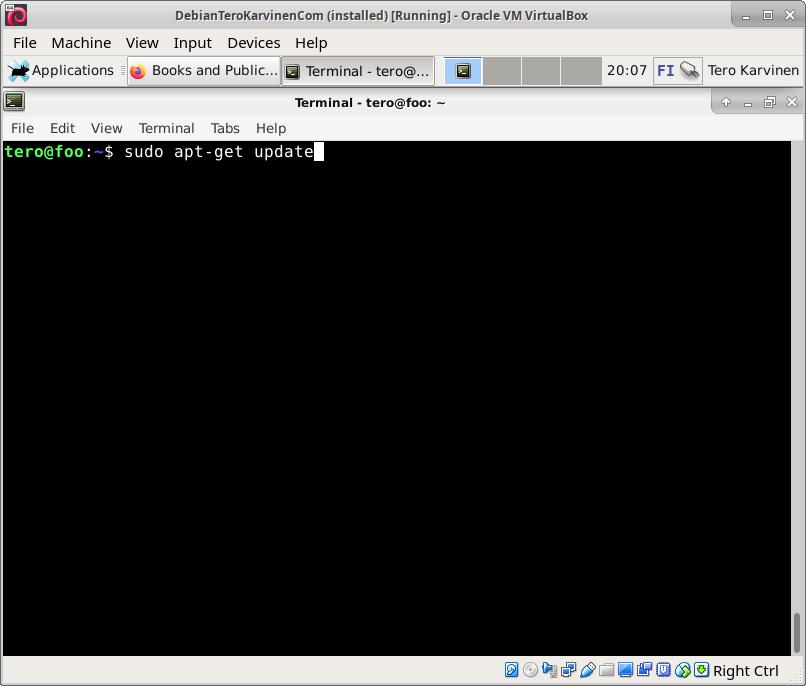
Open the terminal: Applications: Terminal Emulator.
Don't type the dollar sign "$" below, it's the prompt.
Update the list of what's available. Type this command to the prompt, and give your password when asked. Your password is not echoed on the screen, you type it blind.
$ sudo apt-get update
So 'sudo' means use superuser privileges. You are automatically member of sudo group as the first user created in the installer. 'apt-get' is the package manager, it installs software. And "update" just updates information about what we could install.
Upgrade everything. Everything? Latest versions for this Debian? Security updates? Command line apps? Desktop apps? Servers? Yes.
$ sudo apt-get -y dist-upgrade
Here, "-y" says yes to stupid questions. "dist-upgrade" means upgrade everything. It installs the latest versions of all software.
This will take a while, as it upgrades everything. Don't interrupt the upgrade while it's working, and don't close the window before it's done. Normally, 'apt-get dist-upgrade' does not need a reboot. But here, the kernel "linux-image*" was upgraded, so we need to reboot soon.
Install a firewall and turn it on.
$ sudo apt-get -y install ufw
$ sudo ufw enable
And reboot. On top-left "Applications" menu: Log out: Restart.
After the reboot, log in.
Now your Linux has the latest security updates, and it's protected by a firewall. And you did it on the command line. You've got a good start with this Linux thing...
Well done! Enjoy your Linux desktop!
What next?
- Check out Applications menu and try some new programs
- Install VirtualBox Guest Additions (below)
- Browse TeroKarvinen.com for Linux articles
Install Guest Additions for Good Resolution (optional)
The Problem - Virtual Desktop is Too Small
With a real computer, you might be on your way now. But with VirtualBox, we still need to install drivers for our virtual devices. Why is the screen so small? If you stretch the window, your desktop doesn't get bigger, but you just get ugly, gray sorrow borders. You need to install VirtualBox Guest Additions. Also, guest additions will allow you to copy-paste between your host computer (the real physical one) and the guest (virtual) one.
The Solution - VirtualBox Guest Additions
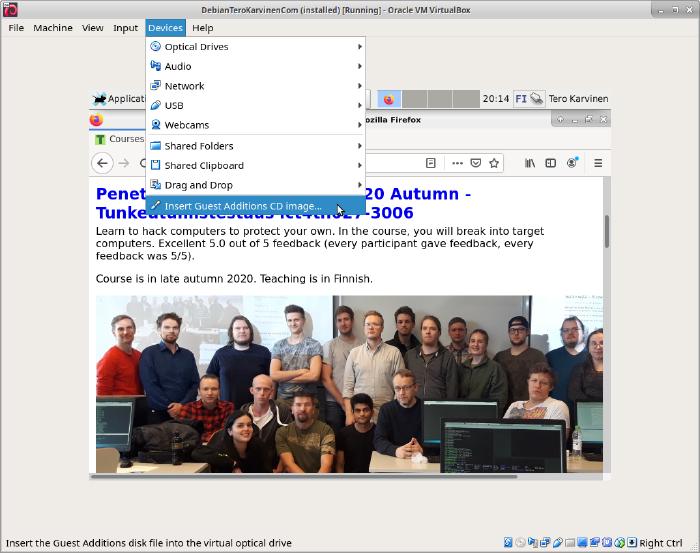
From the "Devices" menu: "Insert Guest Additions CD image...". If prompted to download it, accept the download.
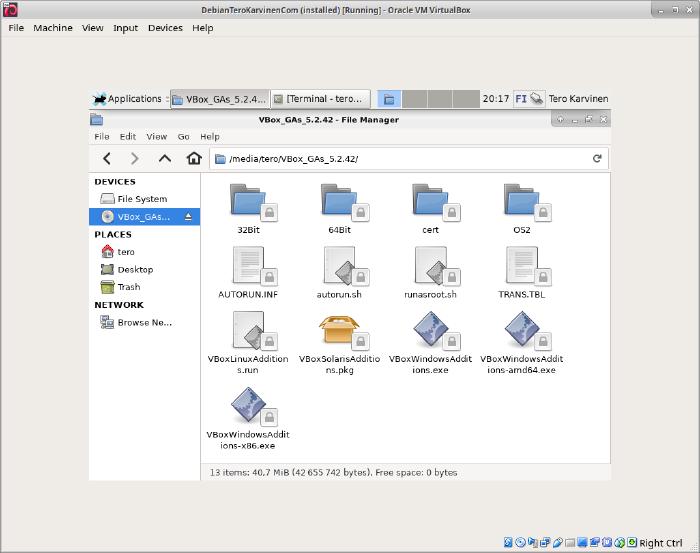
Applications: File Manager. To mount the CDROM, click on the CDROM icon on the left "VBox_GAs...".
Open Applications: Terminal Emulator. Remember not to type the prompt "$" below.
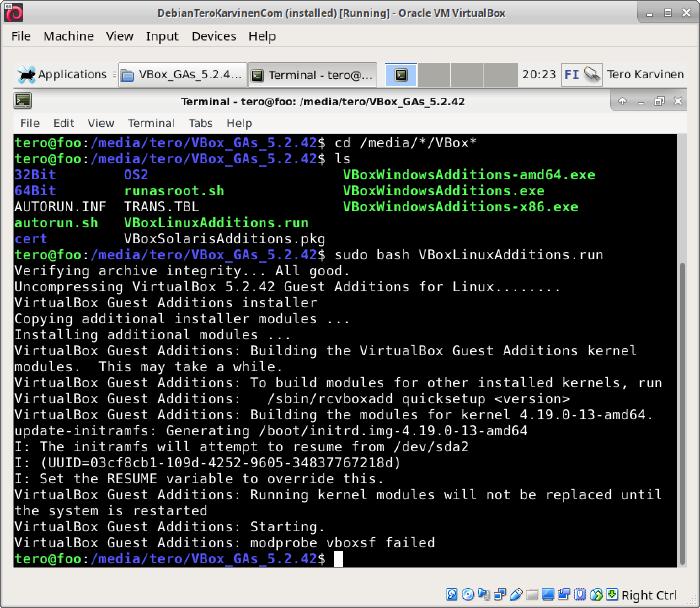
Change to the directory of guest additions CDROM, and list the files in it.
$ cd /media/*/VBox*
$ ls
Run the installer script, using the sudo powers you have
$ sudo bash VBoxLinuxAdditions.run
So it likely says "blah blah blah".. "Running kernel modules will not be replaced until the system is restarted". It also says the same thing in a techinical way "modprobe vboxsf failed". So let's reboot, so we can start using the kernel modules (virtualbox virtual device drivers) we just built.
Applications: Log out. Click "Restart".
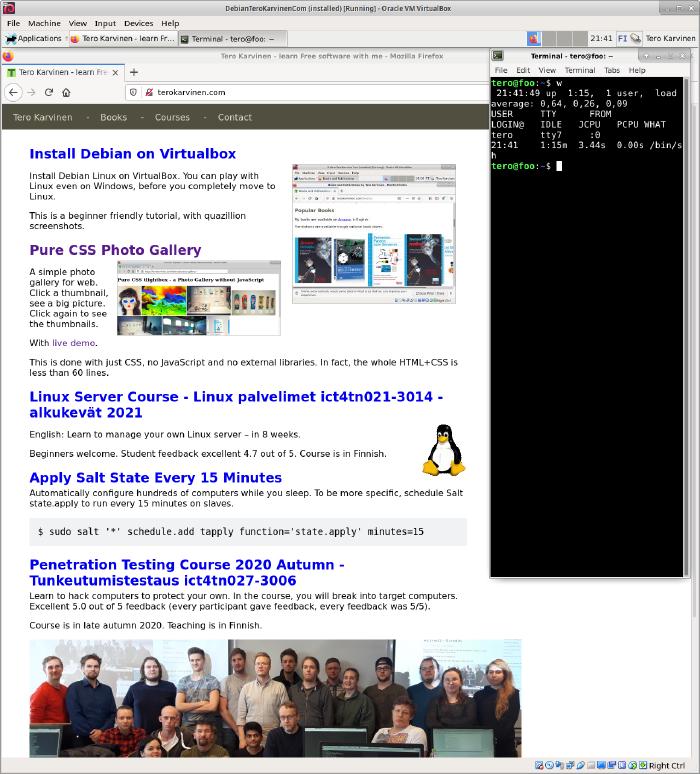
Now we have a big desktop, with good resolution.
And we have copy-paste between host and guest machines. It's in Devices: Shared Clipboard: Bidirectional.
Now it's a good time to save your success. Machine: Take snapshot...
Now you've set up your virtual Debian. Enjoy your Linux!
Debian on Mac M1 or M2
Typical computers are using amd64 architecture. In a typical course, all laptops, servers and desktops use amd64, except M1 and M2 macs.
M1 and M2 Macs use arm64 architecture - that's ARM with an R. I don't have an M1 mac to test with, but you could try with Debian 11 arm64 image "Small CDs or USB sticks" "arm64". Or you could check Teemu Laine's instructions for running Debian 11 with UTM on Mac M1.
New Mac M1 notes Marcus Carr (2024), with Debian 12-Bookworm.
Adminstrivia
Updated 2024-09-26: add new 12-Bookworm Mac M1 instructions by Carr. Updated 2021-04-13 and 2021-05-23; And 2021-07-15, updated Debian ISO link. And again 2022-01-18, updated Debian ISO link again. And again in 2022-08-24, updated the Debian ISO link. Corrected version numbers 2022-10-12. And updated ISO link 2023-01-17. Updated ISO link, added short tips for M1 and M2 Apple Machintosh 2023-05-22. Updated 2023-08-22: ISO link to Debian 12-Bookworm. Added a not about "Skip Unattended Install" and "Expert mode". Updated 2023-11-08: ISO link.