Deploy Django 4 - Production Install
It's easy to write web apps with Python Django. To publish your apps on the internet, you must use a real production web server. This tutorial shows you how.
We'll install Python Django 4 using the recommended Apache 2.4 and mod_wsgi. Django is a popular Python web programming framework used by Instagram, National Geographic and Discus.
Prerequisites
You should know Linux command line. And you should have Linux to run them on, such as virtual Debian for practice. To make your web app available to the whole world, you need a virtual private server.
Convenience Settings
Package metadata needs to be updated, so that any other apt-get command works properly.
$ sudo apt-get update
Let's install my favourite text editor, and also use it with sudoedit. And let tab do it's magic, like fill filenames.
$ sudo apt-get -y install micro bash-completion
$ export EDITOR=micro
Install Apache 2
$ sudo apt-get -y install apache2
Test it by browsing to http://localhost . You should see Apache test page, "It works".
Replace the test page. This is the only place where sudo and an html file fit to the same sentence. We'll do all our web and Django development as a normal user, without sudo.
$ echo "See you at TeroKarvinen.com"|sudo tee /var/www/html/index.html
Test it by browsing to http://localhost , you should see the sentence you wrote.
Create some web content as a user
Go to your home directory, and create directories and sample content.
$ cd
$ mkdir -p publicwsgi/teroco/static/
$ echo "Statically see you at TeroKarvinen.com."|tee publicwsgi/teroco/static/index.html
Add new VirtualHost with sudo
$ sudoedit /etc/apache2/sites-available/teroco.conf
Use your own home directory in place of /home/tero/.
<VirtualHost *:80>
	Alias /static/ /home/tero/publicwsgi/teroco/static/
	<Directory /home/tero/publicwsgi/teroco/static/>
		Require all granted
	</Directory>
</VirtualHost>
Enable our new website, and disable all others. If you need to have multiple websites on the same server (and even on the same IP address) check Name Based Virtual Hosts on Apache – Multiple Websites to Single IP Address
$ sudo a2ensite teroco.conf
$ sudo a2dissite 000-default.conf
Let's check that configuration works before we take it into use.
$ /sbin/apache2ctl configtest
If it only complains about not know it's public name (AH00558) and says "Syntax OK", the config files are good to go.
$ sudo systemctl restart apache2
Let's check that we can access our static files. Browse to http://localhost/static/ or
$ curl http://localhost/static/
If you get "Statically see you at TeroKarvinen.com.", static/ directory is working. Time to get dynamic!
Install Django in VirtualEnv
Create a new VirtualEnv
$ sudo apt-get -y install virtualenv

$ cd
$ cd publicwsgi/

$ virtualenv -p python3 --system-site-packages env
This creates new directory /home/tero/publicwsgi/env/ with your new virtual environment.
- --system-site-packages allows use of Python packages from outside the virtualenv, usually those installed with apt-get. Some packages are more convenient to install with apt, such as ipython and python3-psycopg2 database driver.
- -p python3 makes sure we're using modern Python. Many distributions also contain old Python versions for backwards compatibility, but we only want to use Python 3.
Install Django in VirtualEnv
Let's install latest Django to our new virtual environment.
$ source env/bin/activate
Prompt likely now has "(env)" text. To quit using virtualenv, 'deactivate'. Virtualenv just helps us keep our packages in good order, it offers no security benefits. Each installed package must be individually considered, so it's less secure than apt-get.
Just to make sure, let's check that package installer pip is from the env/ directory.
$ which pip
/home/tero/publicwsgi/env/bin/pip
Maybe it's a bit overkill for a single package, but usually the list of packages to be installed are stored in a text file. So requirements.txt contains a single word, "django".
$ micro requirements.txt
django
And now the install
$ pip install -r requirements.txt
Test it
$ django-admin --version
4.0.2
If you got version 4+, well done, Django is installed.
New Django Project
If you already created a project, you can copy it here. Maybe you already did Django Instant Customer Database Tutorial. But we can also create a new project.
A project in Django is the big thing, usually the website. For example, TeroKarvinen.com could be a project. It could contain apps for each feature, such as comments, crm and chat.
$ django-admin startproject teroco
Connect Python to Apache using mod_wsgi
To set up Apache to serve Python programs, including Django, we need to know three absolute paths:
- Our Django project main dir, the one containing manage.py: "/home/tero/publicwsgi/teroco/" (TDIR variable in config file below)
- Path to wsgi.py: "/home/tero/publicwsgi/teroco/teroco/wsgi.py" (TWSGI)
- Virtualenv site-packages directory: "/home/tero/publicwsgi/env/lib/python3.9/site-packages" (TVENV)
Whenever paths are needed, use 'ls' and tab to write the paths on the shell, then copy-paste them to config file. Less typos means less need for debugging.
WSGI module runs code as the user we specify. It will be the same user we used for testing ('whoami'). Because the code gets input from anonymous web users, it makes sense to create a Django user that does not have sudo privileges, i.e. is not a member of sudo group. This is left as an exercise for the reader. Here, the user is "tero" (TUSER below).
To wrap long lines in micro editor, ctrl-E show minoprompt ">". "set softwrap on". To show line numbers, ctrl-R. For more pleasant colors, ctrl-E "set colorscheme simple".
$ sudoedit /etc/apache2/sites-available/teroco.conf
This VirtualHost config file is quite long and complicated. I recommend you just copy it, and define your own variables at the top (TDIR, TWSGI, TUSER and TVENV).
Define TDIR /home/tero/publicwsgi/teroco
Define TWSGI /home/tero/publicwsgi/teroco/teroco/wsgi.py
Define TUSER tero
Define TVENV /home/tero/publicwsgi/env/lib/python3.9/site-packages
# See https://terokarvinen.com/2022/deploy-django/

<VirtualHost *:80>
        Alias /static/ ${TDIR}/static/
        <Directory ${TDIR}/static/>
                Require all granted
        </Directory>

        WSGIDaemonProcess ${TUSER} user=${TUSER} group=${TUSER} threads=5 python-path="${TDIR}:${TVENV}"
        WSGIScriptAlias / ${TWSGI}
        <Directory ${TDIR}>
             WSGIProcessGroup ${TUSER}
             WSGIApplicationGroup %{GLOBAL}
             WSGIScriptReloading On
             <Files wsgi.py>
                Require all granted
             </Files>
        </Directory>

</VirtualHost>

Undefine TDIR
Undefine TWSGI
Undefine TUSER
Undefine TVENV
Install Apache WSGI module, so that Apache learns what your WSGI commands mean. Remember to install the package that ends with "-py3". Some distros also carry older, Python version 2 packages, which produce weird errors.
$ sudo apt-get -y install libapache2-mod-wsgi-py3
Check syntax
$ /sbin/apache2ctl configtest
Use new configuration
$ sudo systemctl restart apache2
Let's check it out
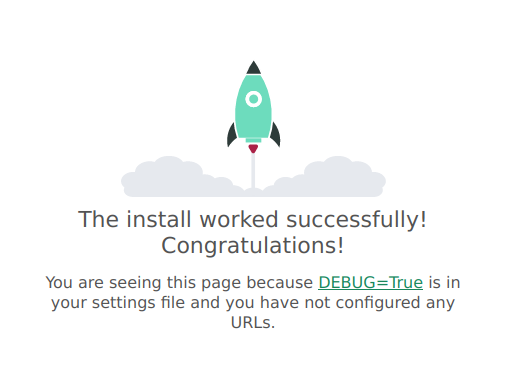
$ curl -s localhost|grep title
<title>The install worked successfully! Congratulations!</title>
Sound promising. Is it really Apache (and not the unsecure development server)?
$ curl -sI localhost|grep Server
Server: Apache/2.4.52 (Debian)
It's Apache, great!
In curl
- -s is silent, so it does not print progress when used in a pipe
- -I just prints server response headers
Let's have look at it with a real browser
Great, we have
- Apache serving our Django project
- mod_wsgi is working
Next, we'll disable the unsecure DEBUG, and tell Django what site it is.
Disable DEBUG
When developing, it's convenient to get errors directly into browser. But we can't show our weak spots to all the crackers and cybercriminals of the Internet. Also, the DEBUG mode in many web frameworks is not protected at all. So we'll disable it.
$ cd
$ cd publicwsgi/teroco/
$ micro teroco/settings.py
This is a file with lots of settings already. Modify these two
DEBUG = False
ALLOWED_HOSTS = ["localhost", "hello.terokarvinen.com"]
When DEBUG is False, ALLOWED_HOSTS default to nothing. Put there the name that is shown in browser when looking aat this site. For testing, "localhost". For others, what ever name you have rented and plan to use for this site. Apache does not read your modified settings or code automatically. When you have coded something new, you can use regular user privileges to load changes
$ touch teroco/wsgi.py
Some bigger changes, like here, might need
$ sudo systemctl restart apache2
Now front page gives 404, because we have defined nothing there
$ curl -s localhost|grep title
  <title>Not Found</title>
You can also type some gibberish at the end of the address, and verify that you don't get a debug view there: http://localhost/tero123
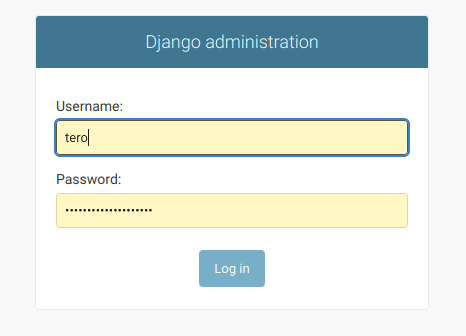
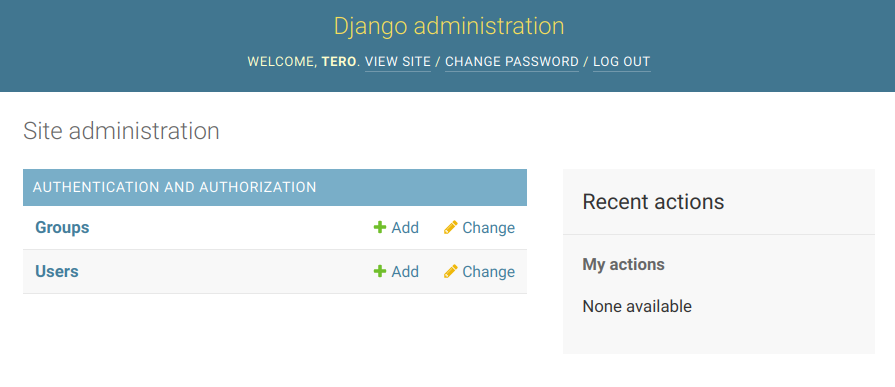
Let's have a look at http://localhost/admin . It works, but it's kind of bare bones. Go ahead, log in and try it.
Static assets, like CSS stylesheets
The development server (runserver) automatically serves static files. Apache does not.
We've already set up Apache to serve static files. We just don't have any yet. Even the admin looks ugly without stylesheet. Let's fix it!
$ cd
$ cd publicwsgi/teroco/
$ micro teroco/settings.py
We can see that "STATIC_URL" is already set. However, STATIC_ROOT is not even mentioned. We could just type the absolute path to our static folder here (/home/tero/publicwsgi/teroco/static/). To make it possible to change directories, we use the predifined BASE_DIR variable. BASE_DIR points to Django project dir, the one that contains manage.py. You can put "import os" anywhere, but the correct place is at the start of the file with the other imports.
import os
STATIC_ROOT = os.path.join(BASE_DIR, 'static/')
Now, we can
$ ./manage.py collectstatic
Are you sure you want to do this?
Type 'yes' to continue, or 'no' to cancel: yes
128 static files copied to '/home/tero/publicwsgi/teroco/static'.
Let's see the stylesheets in all their glory, http://localhost/admin
It's production style setup, and it just works.
What next? Check out the Django Instant Customer Database Tutorial. And maybe even join my Django course.
Troubleshooting
Got it working? No need for troubleshooting, you can start playing with Django.
The real error is in the logs
You can't tell half the Internet all your weak spots, or you get pwned. So web servers will mumble something useless, such as "400" to say it's user's fault in some unspecified way.
The real error message is in the logs
$ sudo tail /var/log/apache/error.log
To follow the logs
$ sudo tail -F /var/log/apache/error.log
To kill it when you're done, ctrl-C.
What if the error is not in the logs?
If you're on your non-public test machine, turn on DEBUG. Just don't enable DEBUG on a machine that's visible on the Internet.
Run some ./manage.py commands, they usually also run some checks on the code and print errors. The interesting part is usually at the end. Just don't make development server (runserver) visible to the Internet.
$ ./manage.py runserver
Oh, and hope you remembered to
$ ./manage.py makemigrations
$ ./manage.py migrate
Apache also has a command to check the syntax
$ /sbin/apache2ctl configtest
You can ingore AH00558 "Could not .. determine .. domain name".
If you wonder if a file you're editing is read at all, just add some syntax errors "asdfasdf" at the start of the file. If you don't get errors, your file is probably not read at all.
I forgot my Django /admin/ password
$ ./manage.py createsuperuser
And give a new password. Always use good passwords. Consider
$ pwgen -s 20 1
Invalid command 'WSGIDaemonProcess' - install Apache WSGI module
Invalid command 'WSGIDaemonProcess', perhaps misspelled or defined by a module not included in the server configuration
Just install the module. Remember to use the Python version 3 package that ends with py3, some distros also carry an older Python 2 package that results in weird errors.
$ sudo apt-get -y install libapache2-mod-wsgi-py3
$ /sbin/apache2ctl configtest
AH01630: Client denied by server configuration
AH01630: client denied by server configuration: /home/tero/publicwsgi/teroco/teroco/wsgi.py
Web server can't read the file. Could be
- Linux filesystem permissions (rwxr-xr-x)
- Missing "Require all granted" in Apache config files
As a bonus, it's a good idea to copy-paste (not type) any paths in erros after 'ls' to see if they exist.
$ ls /home/tero/publicwsgi/teroco/teroco/wsgi.py
But who is the user who has to read the file? Apache usually runs as www-data, but wsgi programs run as the user specified in configuration. If a single user owns the files, the interesting part is either the owning user (u) or others (o). Each directory in the path needs execute (x) permission, the file needsd read (r) permission. Never haphazardly give all permissions to files, e.g. three grazy sevens is usually a serious mistake. See 'man chmod' for details.
$ ls -ld /home/tero/ /home/tero/publicwsgi/ /home/tero/publicwsgi/static/ /home/tero/publicwsgi/static/index.html
drwxr-xr-x 4 tero tero 4096 Feb 16 19:32 /home/tero/
drwxr-xr-x 3 tero tero 4096 Feb 16 19:32 /home/tero/publicwsgi/
drwxr-xr-x 2 tero tero 4096 Feb 16 19:32 /home/tero/publicwsgi/static/
-rw-r--r-- 1 tero tero   32 Feb 16 19:32 /home/tero/publicwsgi/static/index.html
AH00111: Config variable ${TERODIR} is not defined
AH00111: Config variable ${TERODIR} is not defined
- Did you make a typo in the variable?
- Did you make a typo in the decoration? "Define" variables use dollar sign "$" and curly braces "{}", some other types of variables might use something else.
You can use "Define VARIABLE value" in VirtualHost.
Rember to "Undefine VARIABLE" at the end of your VirtualHost config, the variables are not deleted automatically.
Disabled DEBUG in Django, now I get 400 error on every page
You have to add server address to ALLOWED_HOSTS. Put there what's on browser address bar when looking at the site. Default is nothing when DEBUG is False.
set the STATIC_ROOT setting to a filesystem path
$ ./manage.py collectstatic
django.core.exceptions.ImproperlyConfigured: You're using the staticfiles app without having set the STATIC_ROOT setting to a filesystem path.
Set STATIC_ROOT to an absolute path to the static/ folder in your Django project.
Adminstrivia
Update 2023-09-26 w39 Tue: Fixed "Enabled DEBUG...400 error" -> "Disabled DEBUG".