Vagrant LibVirt - New virtual machine in 20 seconds
Create a new virtual machine in 20 seconds. Install only packages from official, main Debian repositories. Does not need VirtualBox or NFS.
Short version for gurus: apt-get install vagrant vagrant-libvirt. Use vagrant normally, but disable NFS with config.vm.synced_folder ".", "/vagrant", disabled: true.
The rest of us can read on for full background and tutorial...
Background
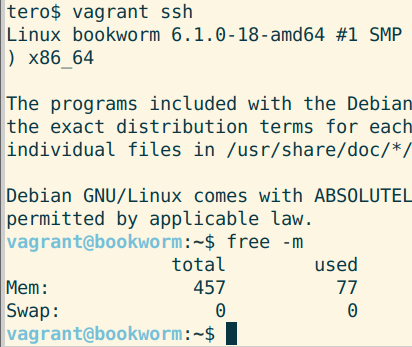
With Vagrant, you can create a new virtual machine in 20 seconds. SSH login is set up automatically. There is no desktop or GUI (graphical user interface), so the whole virtual machine takes only 0.5 GB of RAM.
This article shows you how to use Vagrant on Debian 12-Bookworm. All packages are from official Debian repositories.

Vagrant is often used with VirtualBox, but VirtualBox is not available from official Debian repositories, and it does not have the same security-updates-only promise as official Debian packages.
Instead of VirtualBox, this article uses libvirt, the same library used by virt-manager. This article uses infra-as-code tool Vagrant, so you don't need to use GUI to create new virtual machines.
In my tests, libvirt is faster than VirtualBox. On the first run, a base image is downloaded. Then, the creation of a new machine takes only 20 seconds on a modest desktop.
By default, Vagrant-libvirt annoyingly requires host OS to enable NFS, the Network File System. Use of NFS is both unnecessary and creates a lot of new attack surface. This article shows you how to use Vagrant and libvirt without NFS.
Try it out
Install Vagrant-LibVirt
$ sudo apt-get update
$ sudo apt-get install vagrant vagrant-libvirt
Create Vagrantfile, disable synced_folder
Create a new folder 'mkdir terosvm; cd terosvm'. Then create a new Vagrantfile:
$ vagrant init debian/bullseye64
Add a line to disable synced_folder. Generated Vagrantfile has a lot of commented out lines starting with a hash "#". Comments can be removed, you only need the four lines listed below.
$ micro Vagrantfile
Vagrant.configure("2") do |config|
	config.vm.synced_folder ".", "/vagrant", disabled: true  # add
	config.vm.box = "debian/bullseye64"
end
New Virtual Machine in 20 seconds
$ vagrant up
$ vagrant ssh
...Profit
I'm in:
vagrant@bullseye:~$
Use 'exit' to get back to host OS.
Destroy
To destroy the virtual machine and all files inside it
$ vagrant destroy # deletes all files in VM, no undo
Other Guests
If you want to install Debian 12-Bookworm VM, create a new folder and use
$ vagrant init debian/bookworm64
Troubleshooting
Problem: "Exporting NFS shared folders..." "Preparing to edit /etc/exports" - Solution: Disable synced_folder
Problem:
$ vagrant up
...
==> default: Machine booted and ready!
==> default: Installing NFS client...
==> default: Exporting NFS shared folders...
==> default: Preparing to edit /etc/exports. Administrator privileges will be required...
[sudo] password for tero:
Solution:
Disable synced_folder as described above.
Problem: "E: Package 'virtualbox' has no installation candidate" - Solution: vagrant-libvirt and virt-manager
Problem:
$ sudo apt-get install virtualbox
...
E: Package 'virtualbox' has no installation candidate
Solution:
Use Vagrant with libvirt. It works just like Vagrant with VirtualBox, except that you must disable synced_folder to avoid the need for NFS. See details above.
Use 'virt-manager' if you need a graphical user interface to manage virtual machines. Use of GUI virt-manager is not described in this article.
Problem: "libvirt.libvirtError: Requested operation is not valid: network 'default' is not active" - Solution: sudo virsh net-start default
Problem:
libvirt.libvirtError: Requested operation is not valid: network 'default' is not active"
When you start a VM, there are errors about missing networks. I have received this error with virt-manager, did not have time to cause it / test it with Vagrant-libvirt yet.
Solution:
$ sudo virsh net-start default
See also
Nicolaipre 2023 on vagrant-libvirt bug #900 "Can't disable NFS syncing #900"
Karvinen, "Vagrant" articles on TeroKarvinen.com
Adminstrivia
This article has been updated after publishing, multiple times.