You can sell your web page as an app on Google Play.
This brief tutorial concentrates on the hard parts. I list the command to generate the keys, and include a ready made config.xml. You can just publish your app.
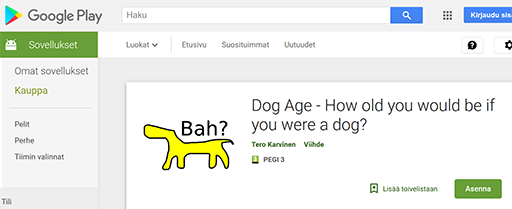
How old are you, as a dog? DogAge is an Android App built with these instructions.

Write a JavaScript Web Page
Write a simple JavaScript app on a valid web page. Check that your program works, HTML validates, and F12 console shows no errors.
Try a Debug APK on your own phone
Register to PhoneGap Build. (You can also build APKs using Free software, but it’s not handled in this tutorial.)
Put your app into a new folder. Include any JavaScript libraries that you are referring to, e.g. jquery.js. Name your main page index.html.
terosApp/
  index.html
  jquery.js
Compress your folder to a zip.
Build your APK using PhoneGap Build. Download your foo-debug.apk. Copy this apk to your phone. You can publish it on a web page, then download it using your phone’s browser; or copy it using a file transfer program. If you are adventurous, you can also try PhoneGap Build QR code.
To allow installation, you must allow “Unknown sources” from Android security settings. Obviously, this makes it quite difficult to get regular end users to install your debug builds.
Create a Release Build for Google Play
Release build must be signed cryptographically. Also, they must have configuration file to state name and supported Android version.
Generate a Keystore
Install Java Developer tools, which includes keytool.
On Ubuntu Linux, keytool works after you install the package. On Mac OSX, same thing, works everywhere after install.
On poor Windows, you must navigate to correct directory before running keytool. Ugly-X: Powershell: ‘cd C:\Program Files\Java\jdk1.8.0_171\bin’ , ‘./keytool ….’. When defineding keystore path -keystore, use your own home directory, e.g. “C:\Users\tero\hello.keystore”.
$ keytool -genkey -v -keystore tero.keystore -alias tero -keyalg RSA -keysize 2048 -validity 50000
Build a Release APK
Upload your secret key to PhoneGap Build. Yes, now you trust them completely. With your secret key, they could impersonate you with fake APKs if they wanted. The key upload is in your account information, “Signing keys”. Use same alias that you used when generating the key.
Unlock your key by clicking the yellow lock. The password is the one you gave when generating the key.
Go to Apps, Android. Select your key from drop down menu. Download your APK. Make sure it’s named foo-release.apk.
Register on Google Play
Register on Google Play. It costs about 25 EUR and requires a credit card. You must also accept their terms.
On the developer console, create a new app. Answer their funny questions. For example, you must provide screenshots with some specific dimensions, as if Google could not automatically crop them. There are a lot questions. Important buttons are disabled (gray) until you have answered everything: Review, Publish… On left side menu, small gray balls show which areas still have questions.
Upload your APK
Between the questions, it’s time to upload your release APK. Do it.
But Google is not happy with your APK. It gives you a list of stuff to fix. Luckily for you, I have a sample config.xml to answer the questions as they were at the start of 2019. And no, I’m not going to keep updating this every month.
Create a config.xml and put it in the main level of your app.zip. Modify my sample config.xml below. You should change
- id
- name
- description
- author
I have already prepared some suitable settings for you that you can use as-is, such as those related to target SDK version.
Recompile your Release apk with the new zip (with config.xml) and upload that to Google play.
Keep answering the questions until it’s release pending. You probably won’t get a notification when it’s ready, just check Google Play next day.
If your app is a high quality open source app, it’s a good idea to release it on F-Droid, too.
While you are at it, check out my Dog Age calculator, a demonstration app of this. If you enjoyed this brief tutorial, feel free to leave your rating on the dog age app.
config.xml
Update: Note that some automatic styling has broken quote characters ‘”‘ below, you must replace them if you want to use this file copy-paste.
<?xml version=”1.0″ encoding=”UTF-8″ ?>
<widget xmlns = “http://www.w3.org/ns/widgets”
xmlns:gap = “http://phonegap.com/ns/1.0”
id = “com.example.i.followed.a.tutorial”
versionCode = “10”
version = “1.0.0” >
<name>Learning Android</name>
<description>I learned some Android on TeroKarvinen.com.</description>
<author href=”http://example.com/myapp” email=”myemail@example.com”>
Tero Karvinen
</author>
<!– all platforms –>
<preference name=”orientation” value=”portrait” />
<preference name=”fullscreen” value=”true” />
<!– Android only –>
<preference name=”android-build-tool” value=”ant|gradle” />
<preference name=”android-minSdkVersion” value=”26″ />
<preference name=”android-maxSdkVersion” value=”28″ />
<preference name=”android-targetSdkVersion” value=”26″ />
<preference name=”android-installLocation” value=”auto” />
<preference name=”android-windowSoftInputMode” value=”stateVisible|adjustResize” />
</widget>
Adminstrivia
Updated: multiple updates on content, title and images.
All trademarks are the property of their respective owners.
