 Install Python 3 Django on Apache, similar to production installations.
These terse notes show how to install Python Django, configure it to use templates and access PostgreSQL database. Finally, we create a simple app to read records from database and show them on a web page.
These are just terse notes without much explanations, but I have tested them a couple of times, starting with a freshly booted live USB.
Prerequisites: Linux command line basics, sudo, filesystem hierarchy, daemons.
Install Apache & WSGI, disable unneeded VirtualHosts
$ sudo apt-get update
$ sudo apt-get -y install apache2 libapache2-mod-wsgi-py3 python3-django
$ sudo a2enmod wsgi
$ sudo service apache2 restart
$ sudo a2dissite 000-default
$ sudo service apache2 restart
Add Project User and Add Yourself to His Group
$ sudo adduser terowsgi
Enter new UNIX password:   [always use only good passwords]
Full Name []: Tero Karvinen WSGI user [always put name of responsible admin]
$ sudo usermod --lock terowsgi
$ sudo mkdir /home/terowsgi/grouped
$ sudo chmod u=rwx,g=srwx,o=x /home/terowsgi/grouped
$ sudo chown -R terowsgi.terowsgi /home/terowsgi/
$ sudo find /home/terowsgi/grouped/ -type f -exec chmod -v ug=rw {} \;
$ sudo find /home/terowsgi/grouped/ -type d -exec chmod -v u=rwx,g=srwx {} \;
$ sudo adduser $(whoami) terowsgi
$ newgrp terowsgi
Create a New VirtualHost for WSGI Django
$ sudoedit /etc/apache2/sites-available/tero.conf
<VirtualHost *:80>
 ServerName terokarvinen.example.com
 WSGIDaemonProcess terowsgi user=terowsgi group=terowsgi threads=5 python-path="/home/terowsgi/grouped/teroexamplecom/"
 WSGIScriptAlias / /home/terowsgi/grouped/teroexamplecom/teroexamplecom/wsgi.py
 <Directory /home/terowsgi/grouped/teroexamplecom/>
     WSGIProcessGroup terowsgi
     WSGIApplicationGroup %{GLOBAL}
     WSGIScriptReloading On
     Require all granted
 </Directory>
 </VirtualHost>
$ sudo a2ensite tero
$ sudo service apache2 restart
Create a New Django Project
$ cd /home/terowsgi/grouped/
$ django-admin startproject teroexamplecom
$ sudo service apache2 restart
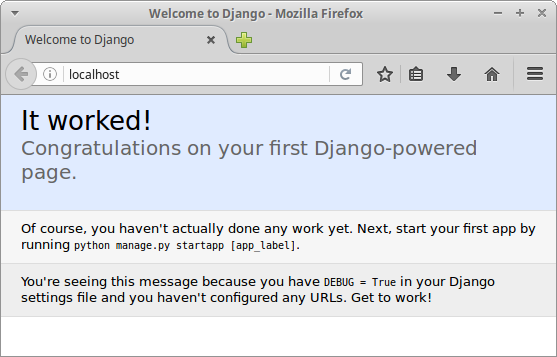
Finally, browse to http://localhost. Do you see Django’s “It works” page? Well done, you have installed Django with mod_wsgi.

Hello Django App
$ cd /home/terowsgi/grouped/teroexamplecom
$ ./manage.py startapp terosites
$ nano teroexamplecom/settings.py
Add terosites to INSTALLED_APPS. This is required for templates to work.
INSTALLED_APPS = (
    'terosites',
    [...]
$ nano terosites/views.py
from django.shortcuts import render
from django.http import HttpResponse
def hello(request):
 return HttpResponse("See you at TeroKarvinen.com\n")
$ nano teroexamplecom/urls.py
from django.conf.urls import include, url
from django.contrib import admin
from terosites import views
urlpatterns = [
 url(r'^admin/', include(admin.site.urls)),
 url(r'^$', views.hello),
]
$ touch teroexamplecom/wsgi.py
$ sudo service apache2 restart
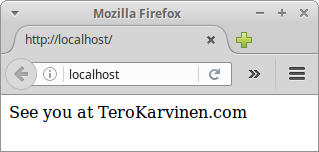
Surf to http://localhost to test it

Hello Templates
$ cd /home/terowsgi/grouped/teroexamplecom
$ mkdir -p terosites/templates/terosites/
$ nano terosites/templates/terosites/main.html
<!doctype html>
<html>
<head>
 <title>Django's Templates are Working!</title>
 <meta charset="utf-8" />
</head>
<body>
 <h1>Django's Templates are Working!</h1>
 <p>Let's test UTF-8 with "päivää"</p>
 <p>See you at TeroKarvinen.com</p>
</body>
</html>
$ nano terosites/views.py
from django.shortcuts import render
def hello(request):
 return render(request, "terosites/main.html")
$ touch teroexamplecom/wsgi.py
Surf to http://localhost to see the templates in action.

PostgreSQL Database
$ sudo apt-get -y install postgresql
$ sudo -u postgres createdb terowsgi
$ sudo -u postgres createuser terowsgi
Use PostgreSQL in Your Django Project
$ sudo apt-get -y install python3-psycopg2
$ nano /home/terowsgi/grouped/teroexamplecom/teroexamplecom/settings.py
Modify the value of DATABASE, set it to
DATABASES = {
    'default': {
        'ENGINE': 'django.db.backends.postgresql_psycopg2',
        'NAME': 'terowsgi',
        'USER': 'terowsgi',
    }
}
$ sudo -u terowsgi /home/terowsgi/grouped/teroexamplecom/manage.py migrate
$ touch /home/terowsgi/grouped/teroexamplecom/teroexamplecom/wsgi.py
$ sudo --set-home -u terowsgi ./manage.py makemigrations
$ sudo --set-home -u terowsgi ./manage.py migrate
Verify That Django Tables Were Created
$ sudo -u terowsgi psql
terowsgi=> \d
[...]
public | django_admin_log                  | table    | terowsgi
[...]
terowsgi=> \q
When listing (‘\d’) PostgreSQL tables, you should see many tables with the word “django” in the name.
Hello Whole Thing: Python 3 Django, Apache mod_wsgi, PostgreSQL
$ nano terosites/models.py
from django.db import models
class Site(models.Model):
 site = models.CharField(max_length=50)
 comment = models.CharField(max_length=160)
$ sudo -u terowsgi /home/terowsgi/grouped/teroexamplecom/manage.py makemigrations
$ sudo -u terowsgi /home/terowsgi/grouped/teroexamplecom/manage.py migrate
$ nano terosites/views.py
from django.shortcuts import render
from terosites.models import *
def hello(request):
 sites = Site.objects.all()
 return render(request, "terosites/main.html", {"sites": sites})
$ nano terosites/templates/terosites/main.html
<!doctype html>
<html>
<head>
 <title>PostgreSQL is working!</title>
 <meta charset="utf-8" />
</head>
<body>
 <h1>Read PostgreSQL database with Django</h1>
 {% for site in sites %}
 <p><b>{{ site.site }}</b> {{ site.comment }}</p>
 {% endfor %}
</body>
</html>
$ sudo apt-get -y install ipython3
$ sudo --set-home -u terowsgi ./manage.py makemigrations
$ sudo --set-home -u terowsgi ./manage.py migrate
$ sudo --set-home -u terowsgi ./manage.py shell
In [1]: from terosites.models import *
In [2]: Site.objects.all()
Out[2]: []
In [3]: site=Site(site="terokarvinen.com", comment="Tero's homepage")
In [4]: site.save()
In [5]: Site.objects.all()
Out[5]: [<Site: Site object>]
In [6]: site=Site(site="botbook.com", comment="Design and build your first robot in a week")
In [7]: site.save()
In [8]: Site.objects.all()
Out[8]: [<Site: Site object>, <Site: Site object>]
In [9]: exit()
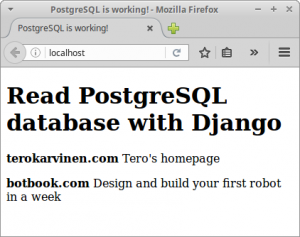
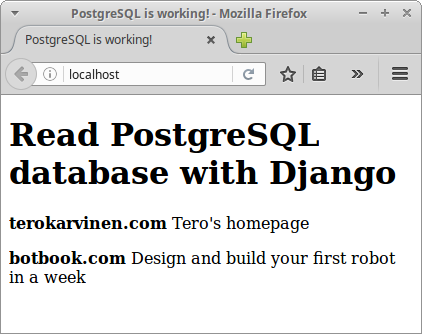
Time to test the whole stack. Surf to http://localhost to see if it works.

Well done! If you can see some records from the database (“terokarvinen.com”…), you did it. You’re now running all components needed for Django production install.
Note that we’re still running with DEBUG=True, so before actual production you must turn on production settings.
I find it convenient to develop with the same stack I use in production. And now you can do it too.
What next?
MDN: Django Web Framework (Python)
Django project: Official Tutorials
When files change, take action – inotify-hookable
References
Install PostgreSQL on Ubuntu – New user and database in 3 commands
Deploy Flask & Python3 on Apache2 & Ubuntu
(old) Hello WSGI – Python mod_wsgi on Ubuntu 12.04 LTS & Apache2
(old) Deploy Flask & Python3 on Apache2 & Ubuntu
Mod_WSGI Project:mod_wsgi Documentation